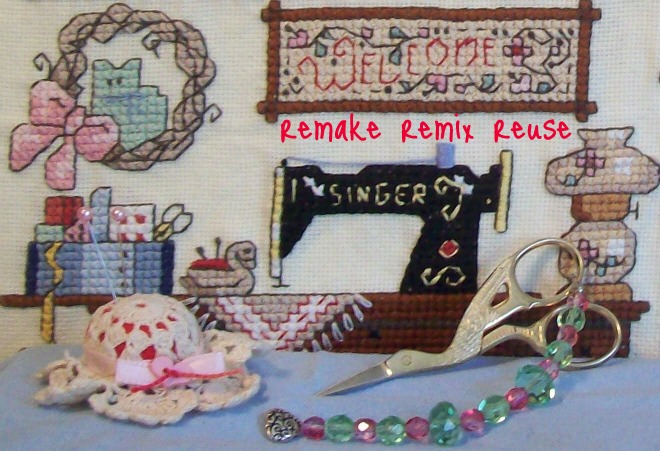
Hello everyone.
How is the weather treating you. Lots of rain here
on my side of the world. Rain beats down the
pollens so we can feel a little better! Oh, how some of us
that are allergy prone love the rain!
Even now as I type this, my head is aching.
Okay, beyond that.
Half-doll pincushions are lovely. Some are old, very-old,
or new. All of them have beauty from their makers.
It is hard to resist looking at the vintage, antique pincushions
or the brand new ones that many crafters are making
from the half-dolls that are being sold.
My definition of a craft is about using what you already have.
Then, buy the things that are needed for that craft, if you do
not have it already.
I hope that you like the WHOLE-DOLL PINCUSHION that I
have made. My inspiration came from seeing the lovely half-doll
pincushions.
I will be using this 7 inch high miniature doll.
Well, she is not a miniature doll that belongs in a dollhouse.
But she is small according to most tall dolls.
Actually, I do not know anything about this doll that I am using. Only
her height, (that I have measured). Also the stamp on her back. After
having sent photos of her to a dear friend, so that she could
show them to her dear friend. Well, long story short they could
not find anything about the doll either.
I looked up Astin and got Ashton Drake, but still I could not
attain any information on her. Her gown is lovely! I believe
that it is a thin satiny-type of a yellow-gold colored fabric.
I love the color yellow but this doll's fabric is not of my taste.
So I thought, that this doll is fair game to use her as a
Whole-doll Pincushion!
A TUTORIAL IS INCLUDED HERE!!!!
THE DIRECTIONS ARE SUPER SIMPLE!!!!!!
MAKE ONE OF THESE!!!
Here are my results


BEFORE PHOTO'S of what the doll did look
like. I only paid $1.00 for her.
She is a lovely doll. Am not sure what she is made of.
It could be porcelain. I saved her clothes
just in case later information does come up
about her. She will be easy to dis-attach from
the pincushion if need be.

The Stamp on her back.

I love the little mole that is close to her left eye. I
cannot imagine who she is supposed to resemble.

This sweet doll had satiny bloomers.

TUTORIAL TO MAKE HER!!!
SUPER-EASY!!!
Materials needed are:
1. A HALF-DOLL with legs or a WHOLE-DOLL with a
SOFT body. You can also use a plastic goggle-eyed doll
for this project.
2. Need paper, cardboard or cardstock to make a pattern.
(I used
cardstock) ------- NEED 4 sheets of whichever
you prefer.
3. Fabric or a baby dress. (I used a baby dress that
said 24s on the label. I have never seen a label like
that, so it could be foreign?? The dress was equivalent
to the size of a 9 month or a 1 year old. (I bought
this baby dress from the thrift store a year ago with
the intention of using the pretty netting and the
stitching for a different project. I am glad
that I did not use it for whatever that was.
Always wash and dry
the items that you get from consignments or
thrift stores.) I did not think to measure it - am
sorry for that. Wish I had of now for you.
4. Quilting thread and small Quilting needles. Quilting
thread is stronger than regular thread and you can
buy it in different colors. So, match up your colors
to your fabric or baby dress. Use the small Quilting
needle because they will help you to make smaller
stitches.
5. I used SOFT COTTON BATTING that I had lying around.
Most stores carry this. I think this one was from
Wal-mart. Cotton batting is smoother that fiberfill
and that is why I use it. I always have batting around
so it was no trouble for me.
You will use about a yard or less. I also use cotton balls
from medicine bottles and dryer lint. If you use the
cotton from medicine bottles, be sure to pull the
cotton apart and blend it in with the cotton batting.
On this project I did not have any dryer lint saved
to use. If you use all 3 of these be sure to mix them
all together before stuffing.
OR USE FIBERFILL, it is your choice. Use what you
have.
6. A small amount of lace for the bloomers.
7. Trim for the pincushion. I used a tiny bit
less than 1/2 yard. What I used was stretchy. It
comes in other colors. This trim is used for
headbands and is almost 2 inches in width.
You can use a smaller trim if you want. I
wanted to also add more stability and that is why
I used a wider trim. Also is it what I had on
hand. I think that most sewing stores carry this.
8. A large cooking pot about 12 inches in diameter.
(The pot needs to be big because once you start
gathering it, then the pincushion shrinks to the
size of the bottom). (If you need a bigger
pincushion then this, then you must use something
bigger in order to cut a large round piece of fabric).
9. Cork or any piece of cardboard about 4 inches
in diameter. (I used a piece of round cork that
was a COASTER for drinking glasses. It is near
the same size as I used)
10. FOR THE PINCUSHION: I used an extra large
old Rayon skirt that only had side seams,
I washed and dried it of course since it has
been taking up space in my closet.
11. A little bow or a rose flower that matches your dolls dress.
PLEASE READ ALL OF THE DIRECTIONS FIRST
BEFORE MAKING ONE - JUST SO YOU
BEFORE MAKING ONE - JUST SO YOU
UNDERSTAND ME. THANK YOU.
THE DIRECTIONS ARE EASY, SO DO NOT
BE PUT OFF BY SO MANY STEPS.
MAKING A PAPER PATTERN. Tape together 4 sheets
of computer paper, cardstock or cardboard with clear
tape. Be sure to tape the backside also.

MAKING THE PATTERN:
Place a large cooking pot on the paper and draw around
it for a pattern.

The size of my pot is about 12 inches in diameter.

Cut this out with paper scissors.

I am using my old Rayon skirt that I have not worn
in ages. It is perfect for this project. Many times, I
spent trying to get a decent photo and this is the best
that I was able to get. The sheen of the Rayon is
preventing me from getting any good photo's.
My skirt is CHOCOLATE BROWN - the color
of a Hershey bar! I cut off the waistband and I now
have a large mound of fabric.

Pin the pattern on the fabric or in my case -
my skirt. MAKE SURE THAT YOU ARE NOT
PINNING A SEAM, IF SO THEN MOVE THE
SKIRT AROUND TILL YOU ARE ABLE TO
GET 2 PIECES WITH NO SEAMS. IF THIS IS IMPOSSIBLE
TO DO WITH YOUR SKIRT, THEN CUT ONE OUT AT A TIME.
CUT 2 PIECES!!!!

Here, I show 2 pieces that I was able to cut out at
the same time because my skirt only had side seams.

This is here just to show you about the size that
I used for the bottom to be placed inside one of the
pincushions.

This CORK COASTER is close to the size of the
cardboard above that I have measured for you.
Adding cardboard or a cork coaster to each
pincushion gives each pincushion better stability.

For the 1st pincushion: I cut a piece of batting and
placed in under the cardboard. You do not have to
do this if you do not want to. I did this so that when
I connected the 2 pincushions together, there was
some cushioning space between them.
NOW, On the outside edge of the round fabric -
turn in the outer edge towards the cardboard and run a
gathering stitch all the way around, gathering as
you go. I used big stitches here!

With my fingers I tore the cotton batting apart into
small pieces as you see here. Some are not so small.
ALWAYS STUFF A PINCUSHION FIRMLY
UNTIL YOU CANNOT GET ANY MORE STUFFING
IN IT.
PACK IT DOWN REALLY GOOD!!! AND
ADD MORE IF NEEDED.
ADD MORE IF NEEDED.

I tightly brought up the gathers - MAKE SURE
THAT YOU DO NOT SEE ANY OF THE BATTING
OR THE FIBERFILL. Cause you do not want any
THAT YOU DO NOT SEE ANY OF THE BATTING
OR THE FIBERFILL. Cause you do not want any
of it to come out later.
This is a good time to get someone to hold the
pincushion while you draw up the gathering thread.
Criss-cross back and forth to close the opening
if you must and be sure to make lots of knots.

This is what the bottom looks like. Now, turn it
over to the front and with your hands start shaping
the pincushion to where the batting or fiberfill
is on top of the (inside cardboard). Shape the
pincushion UP, if you understand me, so that
it is not a fat pincushion on the sides but make it
taller. There is
no other way for me to explain it.
MAKE 2 OF THESE PINCUSHIONS THE EXACT
SAME WAY BEFORE PROCEEDING ANY
FURTHER!!!!!!

I AM SORRY THAT THESE ARE THE ONLY
PHOTOS THAT I HAVE OF PUTTING THE
PINCUSHIONS TOGETHER. I FORGOT TO
PINCUSHIONS TOGETHER. I FORGOT TO
TAKE THE PICS, SO I AM SHOWING YOU
FROM UNDERNEATH HER DRESS.
Now that both Pincushions are made - it is time
to sew them together. Place one pincushion on top
of the other one and hand sew them together. STITCH
the fabric a little above (the inside cardboard pieces)
when stitching together.

Be sure to shape the pincushions again when you have
finished stitching them together. The white dots
you see here is from where my needle went in and out
of the fabric brining a sampling of the batting. It
is so tiny that you only see it really good with the
picture. When you see this, either push it back in
with your needle or do not. No biggy.

With this elastic headband, (DO NOT STRETCH IT
AS YOU SEW IT DOWN!!!!) I started at the back of
the pincushion and sewed through the top loops all
around the pincushion back to where I started at. Then I
anchored the trim by knotting
the thread and I pushed the knot to where you could
not see it. Then without cutting the thread, I sewed
down its seam to the bottom where the loops are.
You must sew the top and the bottom loops down
if you choose to use this trim. I sewed all around
the pincushion back to where I started. I made some
knots in the thread, cut it and stuffed the knots
under the trim. You cannot see the knots.
However, you sew the trim down as you wish for
your type of trim being used.
Hand sewing the trim down only takes a few minutes!

Here is the back of the trim sewn down on the back
of the pincushion.

On the front of the pincushion try to keep the trim
straight as you sew it down. Again, this elastic
headband was not stretched as I sewed it in place.
However sewing a wide strip of trim also adds
stability to the base. And stability is needed.

Here is my pretty doll naked! What I did here
was to, shape her legs. I took her right leg and
bent it some to give the curve, so I could bring
up her knee. Cross her leg over the over
leg JUST A LITTLE BIT, NOT ALOT. Then
I tied some string around the legs to keep them
in place. You do not have to do this step. It is
up to you. It helped me in that I did not
have to keep reshaping her leg.

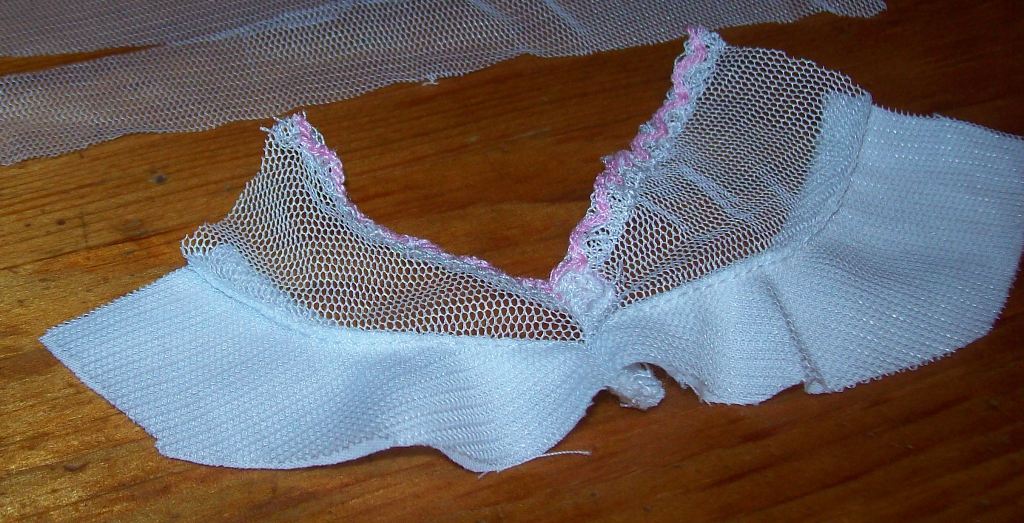
This is the baby dress. I loved the netting that covered
the entire dress. Loved the stitched flowers with green
leaves. I loved how the netting was over white cotton.
The bottom had some pink stitching that was
broke, but to me that adds charm. It did not bother
me.
Pay particular attention if you buy a baby dress. YOU
DO WANT THE SLEEVES TO BE SHAPED
LIKE THE SLEEVES IN THIS DRESS!!!!

I cut both sleeves off, just like this. Only one
sleeve was used. The other sleeve I will
make a slip and bodice for my miniature
dollhouse.

I have taken that same sleeve above and turned
it sideways for you. The doll's bodice is the
right of this sleeve, while the slip is the left side
of the sleeve. I cut this piece almost in half -
ALLOWING MORE FOR THE SLIP SO IT
COULD BE GATHERED. But do make sure
COULD BE GATHERED. But do make sure
that you have enough for the bodice of the doll.
Just measure it up to the doll. CHECK MANY
TIMES BEFORE CUTTING THIS PIECE!
TIMES BEFORE CUTTING THIS PIECE!

Now you see the bodice part opened up. Make sure
that it can stretch around the doll. If so, place this aside
for the time being.
We will start with her petticoat! Run a gathering
stitch a little away from the edge and gather it up.
Place the petticoat on the doll.

You will be the judge here on how far up
you want the white fabric to go. It does not
have to go up all that far. Check my first photos
of the doll to get an idea. When you like it, then
gather up the stitches and knot the thread on the
back of the doll. Without cutting the thread, also sew
some stitches into the doll thru the petticoat to anchor
it better. Stay close to the gathering threads when
doing this. Knot in the back and cut it off.

A closer look for you.

I removed the threads that held the
legs together. Now is the time to add
some lace around each leg. Wrap the
lace around a leg and double the
measurement. Cut the lace and gather it
tightly at the top. You can add a few
stitches to anchor the lace down to
each leg. Make sure seams are in the back of each leg.
However I did not do this.
What I did was gather tightly each piece
of pink lace and stitch it closed. Then I
merely slipped it on each leg. The tightness
of the gathers is what holds it onto the doll.

Now, back to the bodice.

Put wrong sides together as the picture shows here.
With sides even stitch it closed. Trim away some of the
white cotton on the bottom of the bodice so it only
leaves about a half inch.

Turn right side out. See how much of the white
cotton that I left on. Next, starting at the back here,
run a gathering stitch around the bodice, where
you see the stitches at in this photo. (where the netting
and the top of the white cotton meet). See these stitches,
sew the gathering stitches there. This is the back
of the bodice in this photo.

Place the bodice on the doll and make sure that
the front is on the front of the doll. Next, eye ball
the side of the bodice in relation to where
the arm-holes should go. All I did here was cut
a small gash in the netting to allow the arm
to go through. Once I pulled up the bodice like
it should be, I then pulled the gathering threads
at the back of the doll, knotted it and cut away
excess thread.
Next, I placed the doll on top of the pincushion
so as to sew her down.

This is how the doll looks now.

I stitched the dolls butt down onto the
pincushion. I sewed the dolls sides down
on the pincushion but I only sewed the sides
down to where the slip started. I wanted
the slip to be free moving. However do
stitch the doll down TIGHTLY. SO SHE
DOES NOT MOVE.
DOES NOT MOVE.

This side is stitched down. Then I positioned the
doll so that her back is straight up so that she
does not lean back.

As you see her, she is not leaning. She is
straight up as she should be.

For the dress. If you notice on my baby dress,
where the pink bow is, stitching goes straight
across from side to side. I guess this was to
keep the netting and the fabric together. For me
I just cut across on that stitching line. For you, measure
your fabric or baby dress up to the doll sitting on
the pincushions. You will probably need at least
6 inches in length. But before cutting add at least
1 or 1.5 inches to allow for the gathering.
Make sure that you have a good amount for the
width because this will be gathered. Here you see
the side seams of the baby dress. I left it stitched
together. You will have to judge this part because
some people like a lot of gathers and some do not.

I gathered about 1/2 inch away from the cut edge.

Place the skirt on the doll.

This is a close up for you.

There was some stitching on the dress. So I turned
my dolls dress to the side as you see here in this
photo. Then I pulled tightly to gather the dress
on the doll. Knot it and cut away excess thread.

Since the doll has a petticoat, you want to see
it. With a threaded needle, start at the bottom
and stitch up the gown include both layers if you
have them. My stitches are not too big nor are
they too small.

Stitch close to the gathered edge near the bodice.

When the gathers look right, knot the thread close
to the fabric and hide the knot in the fabric before
cutting off any excess thread.

Now, place a bow or a rose flower at this area. See
how you like it. You might want something else
here.

If you pick a bow or a rose flower like me, now is
the time to see it down or glue it. Either is okay.

With that done. Remember the gathered piece
at the bottom of the bodice. With your finger
or a needle, gently tug it out from under the
gathered skirt.

Go all the way around the doll.

If you like you can add a ribbon here or you can
add matching lace, if you do not like the gathers
or if you see them way to much. If you decide
to add lace or ribbon sew it to the bottom of the
gathered bodice so that it will hide the gathers
for you.

I cut ( 2) strips of netting the same size.
1 inch wide x 4 inches long. Look my one strip
is not even cut good. It does not matter, the bad
strip is going to be a bow so you will not see
any unevenness there.

Since I used netting, remember it stretches. So, I
stretched it around her head and then tied it into
a bow. Open up the bows and cut the tails or leave
them long. Its up to you!

The other strip is her shawl. Just fold the ends in
towards the center and wrap it around the doll.
The shawl is not sewed on. This dolls arms move,
so keeping her arms down, keeps the shawl on.

This completes the making of the doll. She has
turned out so pretty that I have decided that I
cannot use her as a pincushion.
Using many pins on Rayon fabrics will eventually prick
the fabric causing it to look bad over time.
Using satins will leave hole marks.
So, I will get a few corsage pins and just stick
in her, and leave them there permanently.
I hope that you will try this! It was fun.
However I did not make her in a day. I took my
time working on her over a period of 2 weeks.
And before that, it took me a whole month to
just decide what the pincushion would look like
or how fancy she would be. I always find this
to be the hardest part of any of my projects.
I hope to make more of these, in different styles
of course. I think that it is about time to buy
me some half-dolls!!
Stay well my friends!
Conny