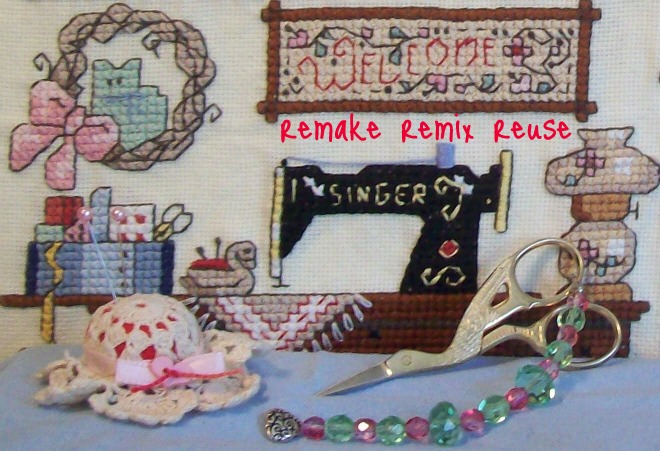
Hello everyone
Are you getting ready for Halloween. Have
you got HALLOWEEN FEVER!!! For a change
I am early.
I have been BITTEN by the Half-Dolls and
their pincushions. Going back to an era that
contained Grace with Beauty. The 1920s, 1930s
and the 1940s were before my time yet everything
they owned had a purpose, a function.
I will be doing tutorials on these half dolls
that I make so you can see how to make the
pincushions for them. I hope to be able to make
the pincushions different for each doll.
As usual be sure to read thoroughly and understand
each and all directions before proceeding onto the
next. IT IS NOT HARD TO MAKE THESE HALF
DOLL PINCUSHIONS, FOR ME, ONLY TIME
CONSUMING. Because it takes me time
DOLL PINCUSHIONS, FOR ME, ONLY TIME
CONSUMING. Because it takes me time
to figure out what I want them to look like.
Generally I use what I have in my fabric piles.
I am known for using old and new clothes.
Some things need a new lease on life!
A LOVELY HALF DOLL IN WHITE WILL
BE COMING FOR CHRISTMAS!!!
BE COMING FOR CHRISTMAS!!!
Her gown is a deep dark black. I took
HUNDREDS of photo's (every step of the way),
and many of my photo's did not take well
(or there would have been more). But if
you know anything about a little bit of sewing,
perhaps you will understand what I am saying
or improvise. Thank you for your consideration
in realizing these tutorials do not always come
easy to make for some people.
MEET MELANIE!
Yes, I know that Melanie is not a good witch name
but I was hoping for a pretty witch. As
it turns out I cannot stick a pin in her
to use, but I can stick a couple of pins
in her to show you her use. I never
plan on taking the pins out!
Melanie is lovely and I hope you
think so also.
As far as I know a Halloween witch has
never been made for one of these half dolls.
So I think that I give to you THE FIRST. I hope that
Melanie sparks your creativity and the interest
to THEME a half doll.
Get ready for lots of photos.
This is a LONG TUTORIAL.
Melanie takes on a mystique quality when it involves
a close up. TAKE A PEEK! Including the half-doll
and the pincushion she is about 11 inches tall.

This half doll only cost me $3.00. That is right!
She was a bargain. The half doll was only dirty.
Melanie cleaned up nicely!

Her cape is glittery and so is her hat.

I used an earring on her hat and silk ribbon for
the cape ties.


This is a fat pincushion! I love it!!!


Sorry that this photo is a little light, but you can
see the gown better. In this pic her face did not
take very well, but that is okay.

Here is Melanie on my cutting table. Sorry about
the mess, but craft and cutting tables get like that.
Or maybe I am just messy like that. Lol.

The deep black gown also glitters because of the
many sequins that is on the gown.

Just a better close-up of the bottom of the gown.


As you can tell this is Melanie's cape.


I lifted up the cape to give you a peek underneath.

You can embellish your hat anyway that you wish.
I opted for something simple.

Here is Melanie without the cape.

A close up of her hat, bodice and skirt.

All of my hats are big. Her hat is 2 inches high
from the top of her brim to the top of the
flower where the hat bends.

This skirt has 3 layers. The first layer has the
ruffle.

This is the second inner ruffle. Even though you
cannot see it - it also glitters with sequins.

This is the inner skirt.

The above photo did not
show the flareness to the inner skirt. All of the skirts
are pure black.

The pincushion is a lovely 100% black silk.

Photo just shows a little higher up the skirt.

MATERIALS NEEDED:
1. I attach the dolls to the pincushion with
a 2 inch curved needle. I also break them a lot! Once
you get the hang of it, they are not so bad to use.
I use the cheaper needles, not these. This photo
is here for you to see. You can attach the doll
to the pincushion using a different method if
you prefer.
2. If you sew the half doll down you will also
need strong button thread in black. I have used
white so you can see better what I have done.
You will also need a sewing needle for some hand
sewing. I always use small quilting needles.

3. Last year I had bought this girls skirt from the
thrift store.
I noticed this year that they are still around,
if you prefer to use the type of skirt that I have.
This skirt has the outer skirt, an inner piece and the
inner skirt ALL ATTACHED TOGETHER by the
waistband. There are plenty of sequins on the skirt.
The waistband is used for the WITCH HAT, so be sure
to keep this part when it gets cut off. Also needed for
the witch hat is any kind of earring that dangles. I
used 4 ready made bows that I bought from Wal-Mart
years ago. I believe these are still around. Check
JoAnn's fabrics or online.

Here is the real color of the skirt. Make sure the
skirt has no holes and is in very good condition.

Just another look at the layers.


This is the tag that was on the inside of the skirt.

4. My daughter's lovely black silk skirt that she no
longer wanted became the PINCUSHION BASE. You
do need a large piece of silk to make this pincushion!
I used a 4&1/2 inch plastic butter lid instead of
cardboard for the base. Again use what you have.
Also needed is Polyester filling or cotton Quilt batting
that I prefer torn into strips and then tiny pieces.
If using cotton quilt batting like me then
it will take a lot for this fat pincushion!

5. This glittery fabric came from a costume
cape/skirt/dress from the thrift store YEARS AGO.
I used some of it for the cape on a porcelain doll
that I remade into a Halloween witch. My grand
daughter Elise promptly took the doll home with her.
I still have some of this glittery fabric left, even
after this project. You will also need black satin or
silk ribbon for the cape ties.

6. You need a Half Doll. I looked around and
found this doll with the orange bodice and
black trim. Perfect for the $3.00 price I paid
for her! Melanie did not have any chips
or cracks on her.

Melanie's back.

LETS BEGIN WITH THE PINCUSHION.
As in the making of the pattern for the other
pincushion, you must make a pattern. Tape together
4 pieces of printer paper. Be sure to tape the front
and the back. You do not want the pattern falling
apart.

You see what I have written on the paper. I was
hoping to get about an 8&1/2 inch high pincushion.
But I did not get that. The pincushion is fat!!!!!
And I love the fatness of it. The height turned out
to be more to 6&1/2 inches high. You will see later
on in a photo the ruler that is placed next to it.
So, I now know that if I want a taller pincushion
that I must go taller than a 12 inch height.
Cut this pattern out and place it on your fabric.
You can place the pattern on a seam or however
You can place the pattern on a seam or however
you wish on the BLACK FABRIC that enables
you to get this size. That choice is yours.

In this photo, I have taken the width of 21&1/2
inches and folded it in half.

I pinned it with pins that you can see

I used white thread so I could see what I was
doing. Anyway sew a seam and be careful not
to run over the pins.

Seam made as straight as possible.
Also be sure to backstitch your seams.
This forms a TUBE. Both sides of the tube
are open.

Cut off the end threads.

My pincushion has only this seam as you can see.
Lay the tube down as you see her so the seam is
facing you.
Put the seam so you can see it.

Finger press it open. Do this several times.

Turn to the right side. Do you see my seam here.

We are going to make the bottom first. See this is
the right side of the tube. See my seam. It does
not matter which side of the open tube that you use.
Just pick one.

Thread a needle with long black thread and set
aside. Start at the seam (as above photo)
and turn under
the raw edge about a half inch.
With the long threaded needle start sewing
through both layers as you see I am doing here.
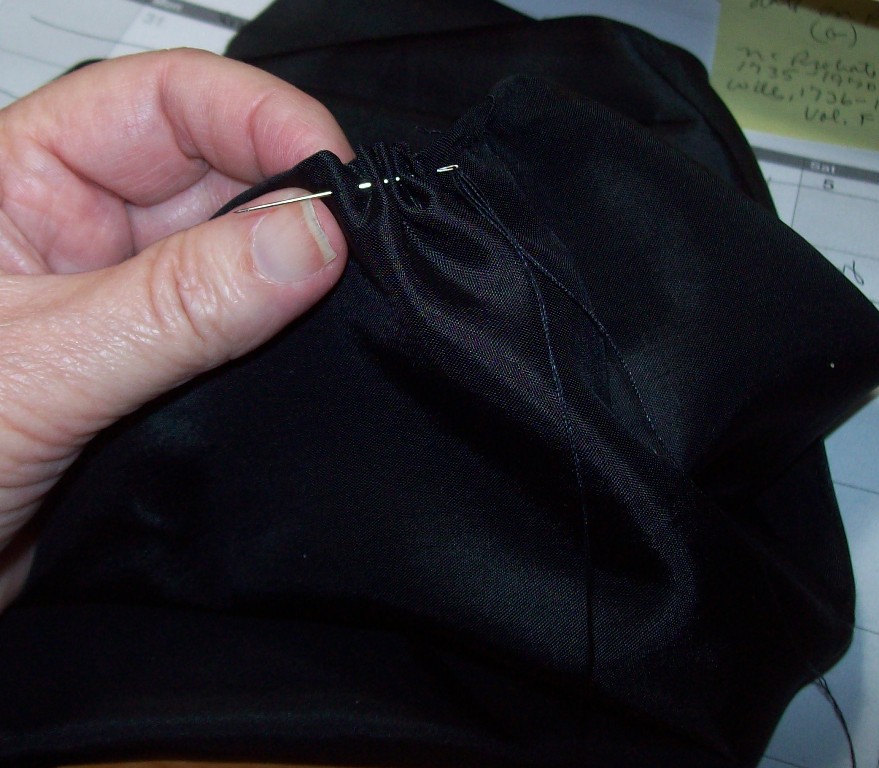
See here.

Once you have finished sewing all the way around
gather it up!

Just gather it up nicely and make sure there are
not any puckers. Keep the tension tight/taut
and knot off the thread on the inside near
the seam.

It will look something like this. If you want a
more rounder shape than what you see here, then
play with it. This look does not bother me.

I used a 4 & 1/2 inch lid (you can use cardboard)
if you prefer.

Place the lid or cardboard on the inside of your
tube. Place it in the middle of the bottom.

Start at the bottom trying to keep the butter
lid or cardboard in the middle of the tube.
STUFF FIRMLY!!!!
With each little bit of stuffing that you do,
be sure to keep smashing the cotton quilt
batting or fiberfill down hard.

I am at the top of the pincushion. And as I sew
the top closed keep adding in batting or fiberfill
till you can no longer add anymore.

Start at the seam and turn under the raw edge.
With a long threaded needle sew through
both layers.

My seam ended up to be a long seam and not
round. I hope this does not bother you. This lady
has hips! I could have still stuffed in more quilt
batting to get as much of the wrinkles out as possible.
Now, at this point you might have to start molding
the pincushion into shape. I have done this also
to mine. Just get a pleasing shape to you while
still making sure that the butter lid or cardboard
still stays in the middle at the bottom

The top of the pincushion.

The bottom of the pincushion. The butter lid or
cardboard is still in the middle. Can you see the
indention of it.

My pincushion worked out to be this high.
Perhaps yours is taller or shorter. It does
not matter.

If you have stuffed it firmly, then it should be
about 20&1/2 inches around. If not it is okay.
Every person is an individual.

Take your half doll and make sure she is
clean and sparkly!


Place the half doll in the middle of your stitching
line. make sure she is even from side to side and
front to back. (I am sorry but the photo's for
attaching the doll did not turn out) Just take a
few big head straight pins and put through the holes into the
pincushion to just anchor the doll down till you
get ready to sew her down. Place her where she
will not get knocked over.
If you have another method of attaching the half
doll down buy all means do what you prefer.
Now is the time to use your method or proceed
on to mine.

I do not put sewing needles in large pincushions
because they get lost inside the pincushion and
can poke you badly. The bottle cap pincushions
or any kind of small pincushion is ideal for needles.
Here is the 2 inch curved needle in the pincushion.

Can you see it better here. Take this needle and
thread it with black or whatever color you wish with
BUTTON THREAD. This type of thread is strong.
So is Carpet thread. Knot the end of the thread.
Take your pincushion with the doll on it and take
one at a time or all of the pins out of the doll holes.
Start with one of the holes and stitch the doll down
into the pincushion. You will have to get used to
putting the needle in and out and how to swing
the needle to come up into the air to be able to get
another stitch. I am confident in you that you
can do it!
Do one hole at a time.
Sorry but those photos did not take! So I cannot
show you anymore of that.
Once you are finished with sewing the half doll
down - then we move onto her gown

MAKING THE GOWN FOR THE HALF DOLL.
Like I said this is the skirt that I used. If you have
found something different and better then that is
okay.

With the half doll attached to the pincushion, we then
must measure. I eyeball everything and then add.
Place the skirt around the pincushion. Do not worry
about her head. (some of these photos also were not
clear). Sorry about that.

Fluff the skirt out at the bottom. Run your hands
around the body of the pincushion and keep the
skirt uniform, at the back pinch together to see how
much fabric needs to come off. Put a pin there and
keep adjusting and playing with it until the skirt
looks right around the pincushion. Do not cut anything.

Mine worked out to be 4&1/2 inches. I will not cut
off that. I will cut off something like 3&1/2 to 4 inches
when I get ready to cut it off. At this point you can
remove the pin if you are working on the skirt now.
You might want to leave the pin if you are taking
a break just so you do not forget the measurement.
I kept right on going.
For now, just measure with a ruler. My first pin
goes towards the top of the fabric but not on the
waistband at the 4&12 inch mark. (By the way
the waistband is little stretchy. And you want that).

Back to the skirt See where my pin headed straight
pins start. Mine starts at the 4&12 inch mark on
the ruler. Yours might start somewhere else.
I pin just as you see here all around the skirt
and I end about 9 inches away from where the first
pink pin is placed. (Remember my first pink pin
is placed 4&12 edges away from the left edge.
So I must stop my pins 4&1/2 inches in the back away from
So I must stop my pins 4&1/2 inches in the back away from
that same edge making it 9 inches total).
Your measurement
might be the same as mine or not. Just remember
that your pin should stop on the backside in the
same place as your first pin started.
Also be sure to only pin through the front 3 layers
of the skirt as you pin around the skirt. Does that
make sense to you. Do not pin the front and back
together. Also notice that I have pinned everything
on the front side of the skirt.
THE MOST CONSUMING PART IN MAKING
THIS SKIRT IS THE PINNING. BUT
BELIEVE ME THIS GOES REALLY FAST!
BELIEVE ME THIS GOES REALLY FAST!
THE REASON IS
BECAUSE BEFORE I CUT ANY OF THIS
SKIRT, I WILL PLACE IT ON TOP OF THE
DOLL PINCUSHION TO SEE IF IT FITS OR
NEEDS TO BE BIGGER.
BECAUSE BEFORE I CUT ANY OF THIS
SKIRT, I WILL PLACE IT ON TOP OF THE
DOLL PINCUSHION TO SEE IF IT FITS OR
NEEDS TO BE BIGGER.

See where I have ended 9 inches away from the
first pink pin.

Now, notice your skirt. See how mine flares out on
the sides. See where I have pinned down this side.
I have placed the pins where they flare out mimicking
the flare of the sides.
Pin the other side the same way. By the way I use
CORSAGE PINS. Sorry, I forgot to tell you sooner.

Just another photo to show you my pins. Be sure
to check and make sure everything is right as it
should be. At this point place it on the pincushion.
If it fits nicely then it is time to cut.
Start at the bottom of the skirt to the left of the pin
and with your scissors cut through the 3 layers all
the way to the top, even cutting away the waistband.

Starting at the waistband, cutting away the seam
from the skirt. Be careful with the pins.

Cut it away all round the skirt untill you get where
the pins end.

On the left is where I started cutting away the excess
fabric with the waistband. On the right is where I
finished cutting at the bottom edge of the pins.
This is my skirt with the 9 inches cut away. Yours
will look similar. This skirt is scrunched up in this
photo, nothing in the middle is cut out here as what the
photo appears.

Now, what I did was to take the right side of the
skirt (like in the above photo) and place that pinned
side on top of the left side. Pins on top of pins. Match
it up as good as you can. Make sure all layers are in
the seam before you sew it together.

I have a photo missing here that just was so blurry that
I could not use it. Anyway I left the pins in and stitched
as you see here. Being careful not to stitch on any
pins. You can see the pink pins are still in the waistband area.
The pink pins are still on the inside edge of
the side seam also.

Then I turned the skirt right side out and took out
those side pins. Try not to let the pins stick you!
Your skirt should have a flare on the sides if your
skirt originally had the flares. See the pink headed
pins. They are still there.

(Sorry about that, I meant to turn this photo before
placing it here).
With a long black threaded sewing
needle turn
under the raw edge and start sewing a seam
through the layers all around the edge of the skirt.
Remove each pin as you go.

Gather it up, adjust the gathers somewhat and leave
a hole big enough to go over the half doll's head.

Place the skirt around the end of the
of her bodice onto the pincushion.
Draw up those gathers as tightly as possible.
Keep the thread taut and tight but do not break
the thread, and knot the thread really good.
And as in quilting draw the thread to the inside
by carefully pulling the knot through to the
inside of the fabric before cutting the thread
off.

Adjust the gathers and play with the skirt
to arrange folds or layers.

Do the same to the back.

The skirt will move. If you have a side longer
turn it towards the back. Adjust and play with
the skirt until it looks right.
It is up to you if you want to give her a nice
ribbon bow, but you do not need it. Remember
she is a witch. I opted to not have one.
SKIRT IS FINISHED.

MAKING THE CAPE.
As I stated earlier. This was a piece of a costume
that I had left over from a prior project.
It is lovely glittery and sheer.

This skirt still had 2 seams left in it. I still have more.

I cut away the excess fabric at each of the
seams. I cut to the right of the seams so I could
still use those seams. Does this make sense
to you? I liked having the seams on each side
of the cape. It kind of finished off the edges.
You might not like it and if that is the
case then cut the seams off.

Here is the size of the piece of this glittery
fabric to use for your cape.

See how I cut to the right of the seam.

See the ruler above. It is there for me to measure
with. I hand sewed almost 4 inches away from the
top. Start at the right side and with a threaded needle
start at the side raw edge and just sew across the
fabric to the other side. The stitches do not have
to be too small nor to big.
Gather up the fabric as you go to about 2 to 3 inches.
Make a knot and cut off the threads.

I used about 12 inches of black silk ribbon
that I bought from the internet. Remember her
pincushion is 100% silk so I wanted the ribbon
to match.
What I did was to fold the ribbon in half to
find the middle of the ribbon, then I placed
the middle point of the ribbon in the middle
of the gathered glittery fabric. Let both sides
of the ribbon dangle. (I am right handed).
I started at the right side of the edge of the
glittery fabric. Placed my knot where you could
not see it and started sewing in the
middle of the ribbon on top of the gathered
stitches. I pulled up the gathers of the ribbon
as I went. This is called rauching. Sew to
the other edge, then I knotted
off the thread when finished and cut it off.
Always hide your knots even if I forget to
tell you to do so.
Place the cape around her neck and tie or
knot it. I did not knot it. I only tied it once.
Let this top part of the cape fall back onto
the rest of the cape. Refer to the photo's if
need be. Fluff it up.

MAKING THE WITCH HAT.
Making a witch's hat is easy. You can
try to find a pattern or try my way.
Everyone is unique. It is great if your
hat turns out differently than mine!
Do not worry or sweat it.
Below is a photo of the waistband. You
want this to be a little stretchy. This is not
the exact measurement that I cut off from it.
You will see below that it is actually a little
longer than 7 inches.
I cut almost in half 4 inches for the top
of the hat. (The top piece
that I cut away will be the brim so do
not throw the leftover piece away).
Because I like a tall hat is the reason mine
is 4 inches. Plus at 4 inches you can scrunch
this hat smaller if you wish.
BUT DO NOT CUT THIS APART JUST
YET!!!
YET!!!
Notice how this bottom piece of the
waistband flares out a little bit. I used
that to my advantage. It is this part that
I will put against the doll's head to get
her measurement.

You can not see how the rest of the piece
(of the fabric above) is scrunched up in my
left hand, but it is. I am measuring her head.
All I did was take the piece and wrap
it around her head. Measure it good and
had about an inch to what you have. If
it takes all 5 inches then that is okay.
If 4 inches will do it then that is okay also.

Okay I have my measurement. I know where
I am cutting the fabric at.

So then I folded that piece of the
waistband fabric in half. See how it is
a little over 7 inches.

See how I cut this. I
cut a little above 4 inches.

Open up both pieces again. See
the shape. This is what you want.
Cut those wings away so that you
have 3 inches of the fabric left.
The top part will be used for the
brim.

I took the 2 pieces, the brim and the hat and placed
them on top of a piece of the glittery fabric
Notice that I rounded off 2 sides of the hat brim.

So, cut the glittery pieces out larger like this.

For the pointed hat part, turn both pieces to the
inside and sew. I hand sewed it. You could
machine sew it if you want. See why I said
to cut the glittery pieces out larger, so that
you make sure it gets sewed in. You can always
cut off excess. I leave the bulk in
for my hats.

Some people sew this to the inside seam. I don't.
I just place it inside up against the seam. If the
wire gets crooked inside then I can twist the
shape into what I like. You must play with it.

Sorry this photo is blurry. Do not enlarge it, it
might hurt your eyes. The wire is inside and I bent
down the top piece. I have also stuffed the inside
with tiny torn pieces of quilt batting to give the hat
shape.

Play with it. Stuff with batting or fiberfill just
far enough up to where her head can still be put
in there. Do not cut off the excess glittery fabric
yet. (I never cut this excess glittery fabric off, I
left it there for bulk to stick in or out).

Here is the brim part. I removed the glittery part
and put as slit in there for her head. Measure up to
her head so her head goes up and in. Put the
glittery fabric on top and cut in a small slit just
enough to open.

I know this part looks strange. But what I did was
slide the brim over the top of the hat to the pointed
hat fabric edge. (not the glittery edge).
Then with white thread as you can see here I started
whip stitching the 2 pieces together. Sew all the
way around the 2 pieces until they are sewn together.
Knot off the thread and cut it.

This photo is very blurry. Do not enlarge it, cause
you can see it better this way.
See where I sewed all around the edge of the brim
and the pointed hat. They are now sewn together.

Turn the brim over to expose your witch's hat.
I lifted up the glittery fabric and rounded off more
of the stretchy hat brim fabric. Do each side if
you want.

A better photo here.

See round off another side of the brim. Once the brim
is rounded off on the corners, cut the glittery fabric
any which way you choose. Cut it off to your liking.
I cut mine up to the brim with little cuts and then
cut some off here and there until it was scraggly
looking. Do what you want to do.

At this point I cut 2 thin strips of glittery fabric
about 6 inches long for the hat ties.

I glued each
strip on the inside to each side of her hat brim.
Let the glue dry good. See the cotton batting inside
of the hat.

I also took 2 one inch strips and sewed them
together. I gathered this up along one long edge
and gathered it up. I placed this on the outside of
her brim. On top of the seam there, I sewed on
a sheer flowered bow. I placed 3 more flowered
bows on her hat. I took an ear ring that had a
dangled piece on it and cut off some of the
ear ring wire so the wire would poke through
to the other side. With glue on the edge of the
wire I shoved it really good into the pointed area
of the hat. Make sure the wire does not go through
the other side of the hat. If it does, cut it off. If
you used batting for stuffing, then you will have to
shove the ear ring hard. The ear ring also came
from the thrift store.
Place the hat on her head anyway you like.
Hide the white or black stitches by pushing it
up into her hat. Tie a bow under her chin. This
also keeps on her cape ribbons tied on.

I hope you have enjoyed the directions and that you
found the tutorial easy. I really hope that I have
not left out anything. If so let me know.
Now, on to find an ugly half doll to make an ugly
witch!!
Thank you for visiting me!
HAPPY HALLOWEEN!!