Showing posts with label Floss Boxes. Show all posts

Sunday, November 6, 2011

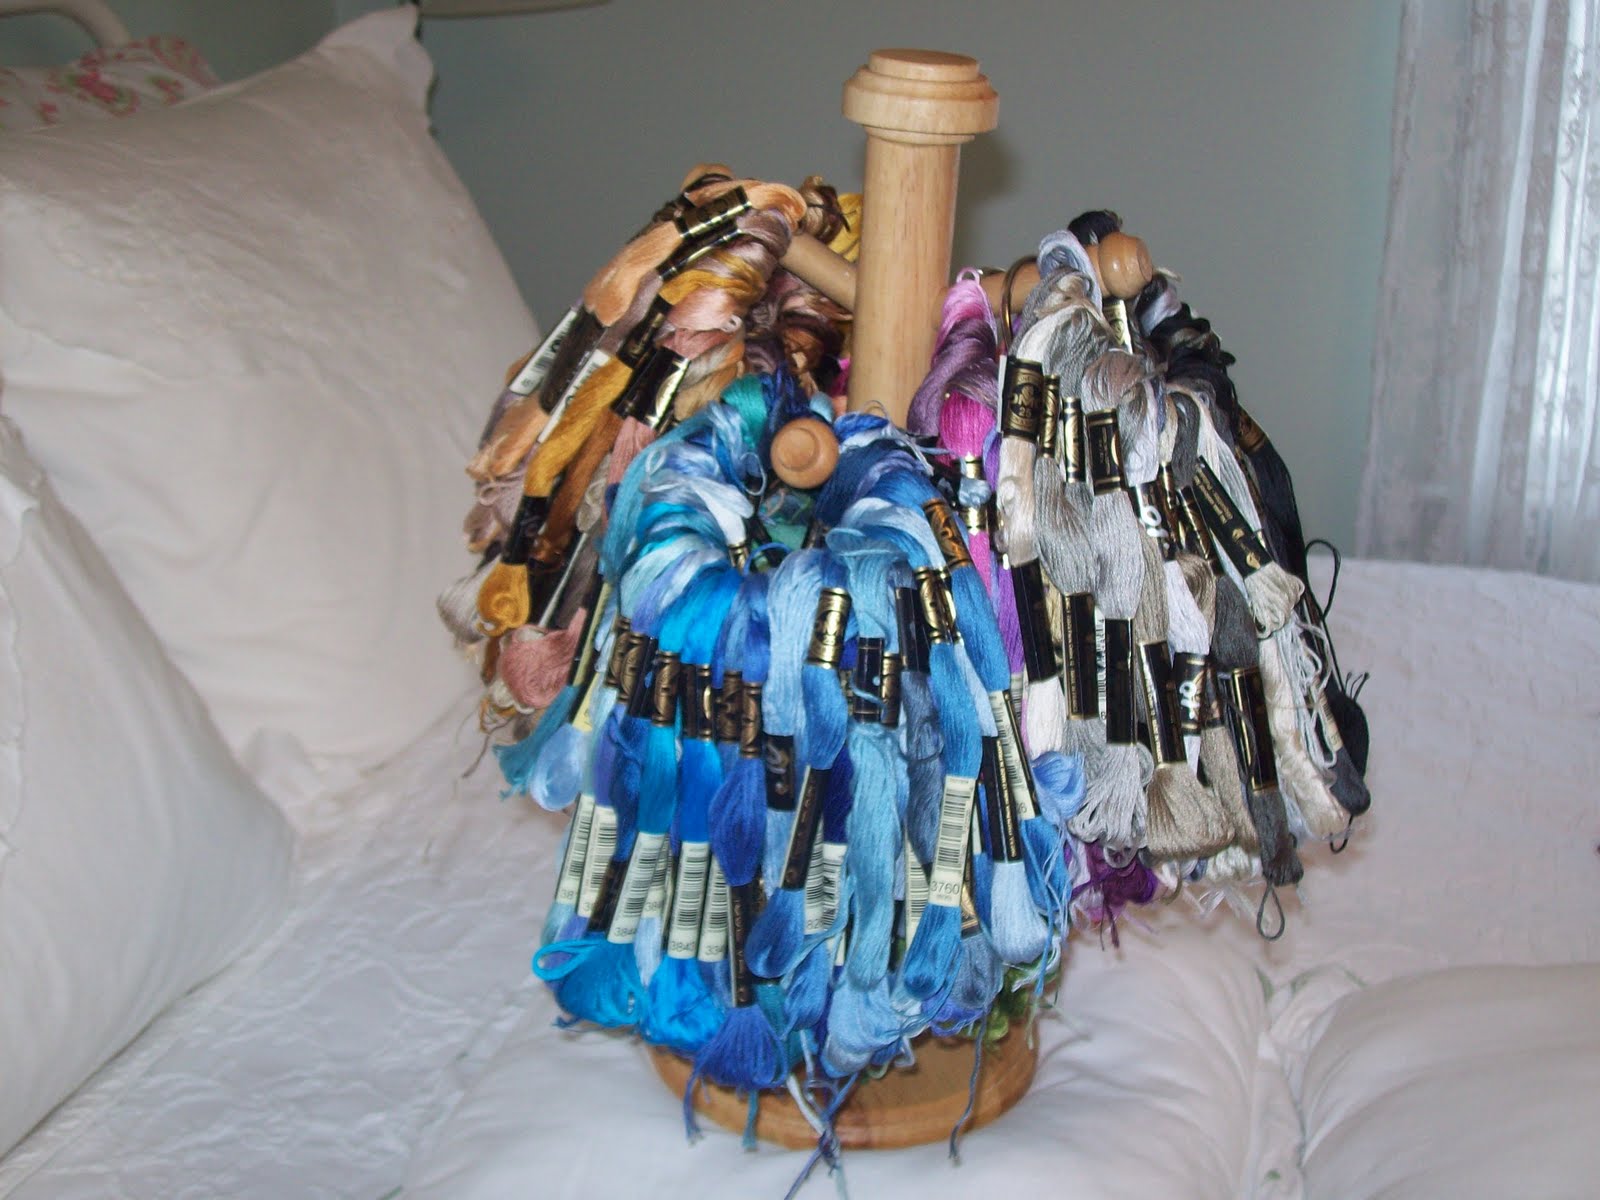
Double-Decker Floss Bobbins

I LOOK AT ALL OF YOUR BLOGS. HOWEVER
MY BLOGGER WILL NOT LET ME COMMENTS
ON YOUR BLOGS. NOW I GET A DIFFERENT KIND
OF MESSAGE THAT SAYS "I DO NOT HAVE ACCESS
TO VIEW YOUR BLOGS". WHATEVER DOES THAT
MEAN? IF ANYONE KNOWS HOW TO FIX THIS
PROBLEM I SURE WOULD APPRECIATE THE ADIVCE!
THANK YOU.
I hope that all of you had a very
nice Halloween. Now that its over we await
Thanksgiving and Christmas. I have always combined
both of these holidays together ever since my hubby
and I have been married. I enjoy that season very
much because at those times I am not in the bed
dealing with environmental allergies.
There are all kinds of bobbins to hold floss. Everyone
is familiar with the small cardboard or small plastic
bobbins that is generally used in all of those plastic
boxes. But have you ever seen these?
 I found them this past Spring at the Thrift Store.
Someone definitely decided that they did not want
to cross stitch anymore. Anyway I have searched
in vain on the internet looking for these double-decker
floss bobbins. I cannot find them. I do not know if
someone made them or if they were bought this
way. I have never seen anything like them in all of
my years of cross stitching.
 So nicely wrapped. They have never been used.
 Look at the pile. All of these double-decker floss
bobbins were on huge rings. These bobbins are made out of
plastic but the plastic is not a thick plastic. Also the
plastic seems to have an almost glitter glow.
I will make a pattern for this double-decker
floss bobbin and post it next week for you. I will also
give you the dimensions of the pattern so you can be
sure to print it out in the right size.
 Take a good look and let me know what you think.
 These are not the same bobbins as I have above. These
bobbins are the large bobbins that sell online. These
do come in double-decker. However I have seen these
online and they do not look like the ones I have above.
 Thread Savers is also a source of floss bobbins.
These are very nice and made of wood. The directions
tell you how to use these. Arent these nice.
Of course if you still like to put your floss on those
small cardboard or plastic bobbins then thats okay.
You can keep these bobbins and glue scrapbook
paper on them. You can use pink paper for pink floss,
blue paper for blue floss and etc...
But if you are looking for an inexpensive change you can always
convert those bobbins to the Singer Sewing Machine metal
or plastic bobbins. These bobbins are not very
expensive and look so cute. You can nearly always
find those sewing machine bobbins at thrift stores.
Have a nice day and thank you for visiting
me
Hopblogger

Sunday, June 27, 2010

If you dont like

displaying your floss on rings & hanging them because
it looks too messy or busy for you - then perhaps the answer
is to use 2 wooden cup holders. Having both of them the same
color helps to unify the team. Later I plan on fixing the tops of both
of these cup holders. Maybe I will paint them - who knows!
by Hopblogger


Tuesday, June 1, 2010

Another use for a COUNTERTOP CUP RACK??

Sorry it has taken me so long to post. My new hutch that my
DH put together - is finished and
now sits on top of my sewing table.
The only thing left that it needs is the trim put on. It is taking a while
to organize everything. Still I am not through so bear with me.
I will post pictures of what everything looks like, later on. Most people
like the plastic bobbin boxes. I dont like all of that winding. By the time
that you wind it all you could have already been stitching. The idea of
placing floss on rings is not a new idea but my idea is!
I hope that you like my new IDEA this week about the
COUNTERTOP CUP RACK. Surely you used to have
one or perhaps you still have it. Take yours or someone else's!! And
display it as a FLOSS HOLDER. Yep, thats right. Its perfect.
First: sort your colors by grouping together color families.
Reds & pinks, yellows & oranges, blue, purples etc... That is how
I have seen others doing it.
Second: thread all of your floss onto a shower ring or floss ring. Mine
is threaded on the large metal floss rings by DMC.
Third: once floss is on the rings then place it on the cup hooks.
You can easily find your color that you are looking for in 2 ways. Either
you know what number each color is or you be sure to
download DMC's color chart and place the chart close to this idea.
That way you will always know what color is in what family.
Also, when the floss becomes too small to hang from the ring - then
wind it on a bobbin & put in a plastic floss box if you like. Or you can
put the leftover pieces in a pile & save it for all of those odd jobs where
you need bits and pieces. The 4th photo shows the top where you
can store extra rings. Look at that, everything is together!
The last photo shows the floss cup rack on my new hutch. By the way
my mothers jewelry box that turned into a floss box is still just that.
Only now it stores specialty threads like the linen floss & variegated flosses.
Hope you like this idea.
by Hopblogger


Wednesday, January 13, 2010

Plastic has already

left the building!! Take a look at my OLD & NEW wooden
floss box. The first 3 pictures is a gentle reminder of how the jewelry
chest looked inside & out. Moma's chest measurements
do differ from Herrschners so therefore not all 450
threads are going to fit into mine. Each of my drawers will only
hold about 83 floss bobbins - but it doesnt matter because
I dont have all of 450 floss colors. I will get them as I need them
just like everyone else does. My husband helped me clean
out the inside of each of the drawers. We found that
the inside cloth was unsalvageable. It must have been dry-rot
because some of it pulled right up out of the drawers.
It only took us about a
couple of hours to clean it out & to sand down the outside.
Thanks hubby!!
As you can see the box is so pretty now. I applied 2 coats
of black paint on it & now it has a rich look. Dont you agree.
I cut 4 pieces of cardboard for each drawer from cereal boxes
& covered them with a pretty cream linen with blue flowers.
The fabric feels so good between your fingers.
When I finally got to the last drawer - I was so excited
that I decided to lay it on top of the chest. Excitement
drove me to start putting the floss bobbins inside before
the box was completed. All of the floss fit into 3 of the
drawers - with the exception of 34 which will go into the last drawer.
Couldnt help myself!!
Below is also a pict of the plastic fishing tackle box
that my sis gave to me full of bobbin floss. Look at all
of those pretty colors - they look even better inside of the
jewelry chest. Thank you momma for the chest & thank you sis
for all of the floss!
I didnt have any need for a jewelry chest - you have to own
jewelry for it. I am so happy with this wooden floss box - so happy
that I am hoping that it can be handed down into the family to
future generations. The cardboard dividers that I put inside
each drawer to divide the floss bobbins are not glued in just in case
one of my descendants decides to use it for its intended purpose. That is
the reason for not covering the cardboard dividers with fabric.
Keep an eye out for a large jewelry chest or several chests the same
size - do a remake,remix,reuse with your jewelry chest. If you dont need
a floss box - why not remake it over into something that you
could use. On the outside of each drawer stencil each
drawer lace, ribbon or beads! These drawers are deep
enough to accomodate ribbon boxes. Hey
you can even reuse it as a sewing box - & number the drawers 1 to 5 or name
those drawers needles, scissors, threads, & pins. If the drawers are
wide like mine try dividing some of the drawers in half or 4ths or 8ths.
Have some fun & break away from the plastic box!
by Hopblogger


Herrschners craft catalog

came into my snail box last week. It is the first magazine that I have ever
received from them. Of course I immediately opened it up & thumbed
through it - loving everything that I saw - as usual.
On page 17 was a very nice 6 drawer walnut floss cabinet for $200.00. Kind of
steep price. So pretty it is......well I cant pay that. Eventually
I put that magazine away & tried to forget about that cute little
floss cabinet. On saturday I went to my grandaughters
house & helped her clean out her room. She gave me back my
mothers jewlry box stating that she would never have
any jewelry to put inside. Hesitantly i brought it back home & put it on
my sewing table - thinking that perhaps
my momma wanted me to have it back.
It was only the following day when I looked thru Herrschners again
that I had a bright idea!!
The first cabinet below is from the magazine & it holds about 75 floss
bobbins in each drawer. The 2cd box has a different
style altogether but that is okay. It is or shall I say
WAS my mothers jewelry chest
& she has owned that box for about 36 to 38 years. In fact I gave it
to her! It was so pretty when it was brand new & all she ever
put inside it was costume jewelry. Anyway the box
is a little beat up & has seen its better days - time for a makeover!
by Hopblogger


Friday, January 1, 2010

DO YOU REMEMBER THAT...

yellow & blue CD case (or whatever it was) a few postings back -
well look at it now. They were not all that
difficult to cut - so I cut the back pieces into cartonnettes. They
are 6 inches high & 4 & 1/2 inches across. The cartonnettes are
different & colorful & really very sturdy with or without the
lace wrapped around them. These book or CD cases would
be very pretty in your floss box as floss bobbins or simply wrap lace or
ribbons around them. So pretty the colors are! I hope that
you can find these items to REMAKE those cases. Keep an eye out for them!
by Hopblogger

Monday, December 21, 2009

I really cannot remember

where I found these at or how long that I have held onto them.
I cannot even remember what their original purpose was for??
Have you ever seen any of these before?? Do you know what they
are?? I believe that they once held CD's - or perhaps some kind of a
thin baby book.
Well, whatever their function was before - I know what you can do
with these if you happen to find any of them. Try to find alot of them
if you can because this idea you might really like! Click on the photo to see
the texture a little better. Sorry guys about the photos but it has been hard
to capture the images as they are light colored. As you can see I also had a blue one
that I already cut to pieces. This book or CD case
is sturdy enough & flexible enough to use. Take an empty
plastic floss bobbin & use
it as a pattern - draw around it onto the plastic & cut them out. You can
even cut the slits at the bottom to hold the floss in. Voila - so easy
& you just might be the only ones to possess colored
floss bobbins. Another great idea is to cut a bigger floss bobbin
from the back - put a slit in it & wind your laces or
ribbons around it. I think I will do that since I dont need
anymore floss bobbins. Once I finish this then
I will post you a photo of it. Also do not throw away
any of those little pieces - you could cut out little
stars & use them as buttons. I hope that you can use this idea. Enjoy
this one.
by Hopblogger


Tuesday, November 3, 2009

DISPLAY OR NOT.....

How do you store your Embroidery Floss, Buttons, Lace &
Ribbons? Do you store them in glass jars, boxes,
dresser drawers & closets. Do you enjoy beauty or
hard working functionality? I happen to like both of
these. Are your collections
small or large? I love all of that stuff & have a hard time deciding
on how to store it. So, it all boils down to display it or not.
Dust - a common allergy dictates most of that decision for me.
Space dictates the other.
Organization is hard in a small space.
Function - I like simple, easy, reusing, remaking it & mixing
it all up. I also like for it to be pretty!
The picts below are only 2 of my flatware chests that I have kept
for many years stored in my attic - not knowing what
I would use them for.
But because they are nice wood - I havent
been so eager to toss them out!
It finally dawned on me what to remake with them
after looking at many of the French blogs concerning
their cardboard boxes - which I find them to be beautifully handmade
with exceptional quality. Oh! how I desire one of them!
I am in love with cloth covered cartonnage - the
french word for cardboard.
Sorry guys - I had already stripped the inside
of the flatware boxes & applied
one coat of white paint on the inside of one of them before I
took these photo's. The other
box will be covered in cloth on the inside.
These boxes would be great for storing
lace & ribbons on cardboard holders which is what the
french call cartonnettes. Have you seen the wood boxes
that hold embroidery floss? They are expensive, beautiful & by me
unattainable!
Well thats exactly what
my 2 flatware boxes are going to hold. They are going to
experience & begin a new life
for holding embroidery floss bobbins! Check out those French
blogs & look at the cardboard dividers they cut from
cardboard & cover with cloth.
One of these boxes will be
going to my daughter. I will post the picts when I am finished.
The only problem - is deciding if I should paint or cloth the outside
of the boxes.....decisions, decisions.
by Hopblogger