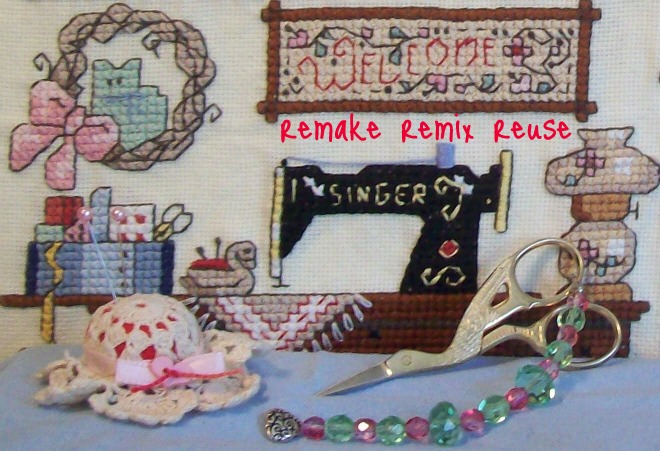
Thursday, March 28, 2019

FREE CELL GAME #7107

Hello there!!
I love to play free cell.
I won this game back in 2011 and just now
found that I never posted it!

Perhaps you have already won it but if
not here are the answers!

Have fun!!

1. Place Queen Clubs upstairs
2. Place the 5 Diamonds on the 6 of clubs
3. Place 4 Hearts on the 5 of clubs
4. Place King Clubs upstairs
5. Place 7 Clubs on 8 of diamonds
6. 2 ACES ARE SET FREE
7. Place 8 of Clubs upstairs
8. Place 5 Clubs stack on 6 of diamonds
9. Place 3 Spades on 4 of hearts
10. Place 8 Diamond stack on 9 of spades
11. Place 8 Clubs on 9 of diamonds
12. Place 6 Diamond stack on 7 of clubs
13. Place Queen Clubs downstairs in free cell space
14. Place 6 Hearts upstairs
15. Place Jack Diamonds on Queen of clubs
16. Place Queen Clubs stack on King of diamonds
17. Place King Diamond stack in free cell space
18. Place 10 Spades on Jack of diamonds
19. Place 9 Diamond stack on 10 of spades
20. Place 5 Hearts upstairs
21. Place 6 Hearts on 7 of spades
22. Place 7 Spades stack in free cell space
23. Place 6 Spades upstairs
24. Place 4 Spades on top of 5 of diamonds
25. Place 9 Clubs on 10 of hearts
26. Place 4 Clubs on top of 5 of diamonds
27. Frees the Ace of diamonds
28. In free space place 6 Spades, 5 Hearts and 4 of Clubs
29. Place 5 Club stack on 6 of hearts
30. Place 8 Diamonds stack on 9 of clubs
31. Place 5 Club stack on 6 of diamonds
32. Place 8 Spades upstairs
33. Place 4 Diamonds upstairs
34. Releases 2 diamonds
35. Place King Hearts upstairs
36. Place 8 Hearts on top of 9 of spades
37. Place 8 Hearts on top of 4 of spades
38. Place 3 Hearts on 2 of hearts
39. Releases the 2 of diamonds
40. Place 3 Hearts on the 2 of hearts
41. Place the 4 Hearts on the 3 of hearts
42. Place 4 Diamond stack on the 5 of clubs
43. Place 7 Spade stack on 8 of hearts
44. Place 5 Diamond stack in free space
45. Place 6 Clubs in free space
46. Place 5 Diamond stack on top of 6 of clubs
47. Place Jack Hearts upstairs
48. Place Queen Diamonds on King of spades
49. This frees the 2 of spades
50. Place 3 Spades on 2 of spades
51. Place 4 Spades on 3 of spades
52. Place King Clubs in free space
53. Place Queen Hearts on the King of clubs
54. Place 7 Hearts on the 8 of clubs
55. This frees the 2 of clubs
56. Place 6 Club stack on the 7 of hearts
57. Place King Spades stack in free cell space
58. Place 5 Spades on top of 4 of spades
59. Place Jack Spades on the Queen of hearts
60. This releases the 3 of clubs
61. Place Jack Clubs on the Queen of diamonds
62. Place 4 Clubs on 3 of clubs
63. Place 5 Hearts on the 4 of hearts
64. Place 6 Spades on the 5 of spades
65. Place 10 Hearts stack on the Jack of clubs
66. Place 8 Spades on the 9 of hearts
67. Place 8 Hearts stack in free cell space
68. Place 9 Spades in free cell space
69. Place 8 Heart stack on 9 of spades
70. Place King Hearts in free cell space
71. Place Queen Spades on King of hearts
72. This releases many cards
73. Place Jack Hearts on the QUEEN OF SPADES
74. Place 10 Diamonds on Jack of spades
75. Place 10 Clubs on Jack of hearts
ALL CARDS FLY!!!!

I WON!!!!

Monday, January 23, 2017

MAKE AN EASY AND SWEET POWDER PUFF

Hello Everyone!

Am sorry that it has been a while since I last
posted. All of the Holidays caught up with
me!

So I hope that you like what I have been
working on. If you know someone who
uses powder and needs a powder puff,
then this easy Powder Puff is for you.

It is easy to make. The materials used are
not costly. It is up to you if you buy
your materials which adds to the cost of
making anything or you use what you
have which reduces the cost considerably!!

I am going to show you 2 styles of
the powder puff - BOTH ARE MADE THE
SAME WAY!

Please read all directions carefully and
make sure you understand them before
making the puff.
If you like what you see, please link back!!!

You pick the style of the puff that you like -
directions are easy! The only difference is the
top!

SUPPLIES NEEDED:
1. Make-up sponges.
2. lace or thin sweater fabric 3inches X 12 inches.
3. Needle and thread.
4. Cotton quilt batting.
5. A small amount of pretty trim.
6. A Corsage Pin.

STYLE 1 - This is Lynda's Powder Puff - top view! Isn't it
pretty!

Here is the side view of her powder puff.

STYLE 2 - This is my daughter Pep's powder puff.
Top view - this is very pretty also!!

This is the side view of her puff. Same as Lynda's!

This is the bottom of both styles of the
Powder Puff.

I went looking at stores for these makeup
sponges, I guess that is what they are called.
I bought mine on ebay from china cause these
were the right size that I liked and from looking
at them - they looked soft and thicker than the
ones I had seen. Plus they were bigger.
You buy yours any size you want in the stores
of your choice.
You will find that these sponge fabric makeup
sponges are cheap!

These sponges have a sweet old-fashioned look
to them and they are super soft!

This is the back of the package.

The size of the sponges are about 3 inches in
diameter. You can make these puffs smaller
or bigger - it is just according on what sponges
you find.

But, try to find sponges that are as thick as you
can. The sponges are thin, but some are a little
thicker than others.
See the silk ribbon where you put your fingers
through. Make sure your sponges have this
feature.

The first thing to do when making these powder
puffs is to cut just one of the silk ribbons away
from the sponge. Cut as close to the seam as
you can without cutting the sponge fabric.
Like I have done here.

See, it is loose now. Do not cut the other
side.

Turn under a small hem.

And pin it down onto the sponge.

See, this is what it looks like from the inside
as it is pinned with only one pin.

I always use small Quilting needles along with
quilting thread. As this thread is stronger than
regular thread.
Nothing is more annoying than your thread
breaking while you are stitching - so use
good quilting thread!

Here you see that I have sewn it down already.

Use wide lace or you can do what I did!
This lace is not lace at all!! It is part of a piece
of a nice old sweater. That is right - a sweater!
I like the holiness of the sweater plus this is
a fine sweater - not bulky at all.
Since this sweater is thin, I will need to cut 12 inches
of it in length. I used the bottom of the sweater.

I cut the sweater 3 inches wide.

I do realize that it is hard to tell what I have done
here, but I folded the length in half. The raw
edges are at the left. The right side is the folded
side. The top and bottom of this piece are the
raw edges. See the bottom at how the edge
rolls up. That is why I cut the sweater up - I got
tired of my sweaters hem rolling up!
The sweater was free. It was mine and it was
clean and had no defects.

Okay, so I picked up the piece and stitched
the 2 sides together into a tube.

Can you see that it is just one piece now with
a seam.

I started at the bottom rolled edge. Start at the
seam. And just sew all around the tube so you
can gather it up.

Here it is being gathered.

Gather it nicely and pin it to the sponge. Be sure
to put your lace or sweater fabric on the side of
where you sewed down the ribbon cause we want
to hide the ribbon seam.

Keep in mind that as you are looking at my
photo you can see the rolled hem of my
sweater. I will try to stitch the sweater to the
seam of the sponge. This is your guide.

I stitch with one strand of the thread. Hide your
knot and begin sewing as close to the ribbon as
possible. Be sure to keep the sweater or lace as
close to the seam as you sew. Do not make your
stitches too small or to big.

Also hold the lace or sweater with your thumb
like I am doing in this photo. This is just to
get started.

As you can see here in this photo. I have opened
up the sweater tube so I can get my fingers on
the inside to help hold the fabric down with
my thumb.  I am almost finished sewing.

This is what it should look like when you
are finished.

Now you should stitch a trim there to hide the
stitching and also to finish it off nicely.
You can pin it down or hold it down and sew as you go.
You are the stitcher so do whatever is comfortable
to you.

I have sewed on the trim and hid the seams
or any frayed edges. You do the same.

Now, scrunch up the top as you see here and you
will see and feel that it is a little too thin.

I took a sponge and cotton quilt batting.
I cut 4 pieces of the batting the size of
the sponge. Just lay the sponge on top
of some folded batting and cut the batting,
but make sure not to cut the sponge!

Now open it back up and put the 4 layers of
cotton batting inside.

Scrunch up the top again and make sure that it
feels good to your fingers. If it looks to thin,
then just add another layer or 2 of cotton batting.

Get someone to hold the top closed as tight as possible.
Take some quilting thread and tie around the top
like you see here. Keep going round and round
the top until you are near the end of your thread.
Be sure to knot off the thread and then cut away
any excess.

Here the knotting is finished.

This is what the top looks like for both styles - when
you fluff out the top.
I call this tuft of fabric a flower!

FOR STYLE 1 - Push the flower down. Then
pin on the corsage pin. The flower can be seen around
the corsage pin.

FOR STYLE 2 - You must cut off some of the
flower so that when you pin on the turtle
corsage pin, the flower is hidden beneath
the corsage pin.

This is the side that you pat into the powder!

I hope you liked this easy Powder Puff!!

Say you saw it here and always link back!!
Please give me credit for tutorials that
I give to you!
Thank you for visiting me.
Come again!

Hopblogger


Sunday, October 16, 2016

Annie's Pincushion!

Hello Everybody!
How have you all been? I hope you are all
crafting!

I bet you think that I forgot about you, but that
is not so. Sometimes it takes me a while to put
something together. Sometimes what I have
planned does not always look right or go
together, so I scrap it and move on. That
generally takes me on hunts.

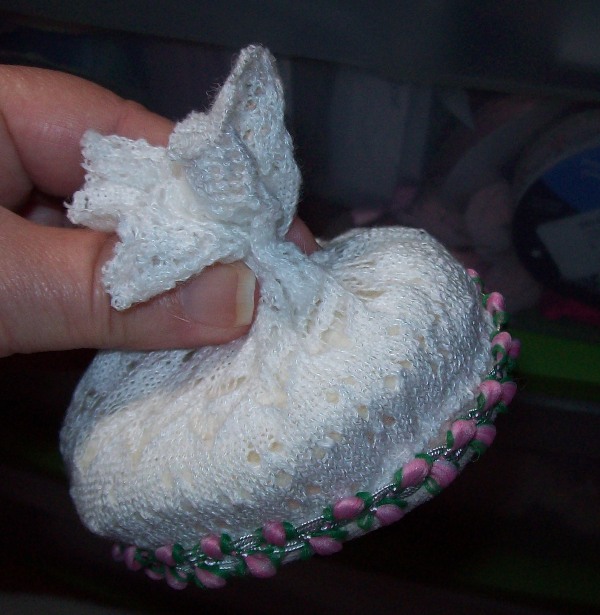
This is the last of my half- doll pincushions that I
will make for a while. I have more half-dolls that
need pincushions, but my aim here was to
show you how I make and put these pincushions
together. Believe me anyone can do this.
Do not worry about ever washing these pincushions,
because there is no way to do so unless you take
them apart and remake them. When you purchase
an old one from the net because it has not been
washed in about 50 years or longer, then it is
time to renew the pincushion and update it all
to your liking!
However some of them are vintage and are so
sweet that perhaps you just want a vintage one
sitting around. Nothing is wrong with that folks!
Just spray some Febreeze on it if it smells!
I love vintage also!!

After this listing, next month I was going to post
little patterns on different sizes of the cushions.
But there is not any need for that. If you read here
about the strips, (further down), then you will see
that you can
make the strips as wide or as tall as you want.
I will post pincushion patterns for these
half-dolls that are unusual. I love unusual and
different as they show character to the pieces.

By now, everyone that enjoys making these
pincushions know how easy they are. The
directions for Annie's Pincushion is simple,
and some of it you can refer back to the other
Pincushion directions, if you do not understand.

ALWAYS REFER BACK TO MY PREVIOUS
PINCUSHIONS DIRECTIONS, ALWAYS LINK
BACK!!! THANK YOU!!

Annie's Pincushion will be sent to her by the end
of this week. It must go to England!
She turned out lovely - don't you think so!
The height of Annie is 7 to almost 7.5 inches tall.
Front of Annie!

Back of Annie!

This is the fabrics that I had planned for Annie. All
of these fabrics blended so well with her blouse.
These worked up so nicely. I only had problem with
the fabric on the left. It was so stiff and stood out
like a pumpkin. As you can see, I did not use it!
I scrapped that idea and opted for a lovely stiff
lace to go around the bottom of the dress and the
same lace to go around the waist.
The inside of the fabric was a lovely Barbie gown
that I used because I could not find anything that
matched the way that I liked.
The other 2 surrounding fabrics were brand new.

I started out with 4 pieces of the solid green fabric.
Each of the 4 strips measured a little over 2.5 inches
wide X 7 inches tall to accommodate the seams.
If you want this fatter or wider, then merely adjust
the strips by cutting them taller or wider.
SUPER EASY!!

Next, sew them by the machine for
strength into a tube! Try not to make
your seams too big as this will cut
down on the size of the pincushion
that you are trying to make.

This is by far my most favorite of making these
pincushions! I love to turn down a hem to the
inside on the bottom and top.
As you can see, just turn under a small piece of
the top and hand sew it all around. I use quilting
threads with small quilting needles. To give the
thread even more strength, double it up.

After you sew it all around, gather it up tightly and
knot it off. You want a small hole.

Take some cardboard and a template of some kind.
I use a lid here that measures almost 3 inches around.
I am using cereal boxes, so I cut out 2 pieces of
this cardboard and glue together for strength.
Let dry for a couple of hours before proceeding on.

I have inserted the cardboard inside of the tube.

This is a big zip-lock bag full of cotton stuffing.
I use cotton batting for all of the pincushions.
It is better for the needles. I cut it up and put
it into the bags and use it when I need it.
This is easier for me. The bag is generally
really stuffed with the cotton batting, even
though you cannot tell it!!

Like I have said many times, stuff your pincushions
really hard. Things settle over time.

Once you have finished stuffing, turn under a small
piece of the fabric and hand sew all around the edge.
Knot it off and gather it tightly,

She is finished. Only thing to do now is to even
out the pincushion with my hands by pushing and
moving the cotton stuffing around.

Here is the top.

I will not go into attaching the half-doll onto
the pincushion again, as by now you probably
know how to do it. If not just take a look back at
the other pincushions.
Annie is now attached!

Also I did not add any directions here on the
skirt, cause the other dolls show how to do so.
Annie before anything is added to her skirt!

A picture underneath Annie's skirt!

I only had a little bit of the lace for this doll's
gown. I hand sewed it on. When doing this, do
not cut off any lace, wait until you finish sewing
it on before you cut off any excess.

Sewing around!

Almost finished sewing!! When you come to the
end always leave about an inch of the lace before
cutting off the excess so that you can turn under
the raw edge. Afterwards I folded in the sides
of that raw edge and hand stitched down
the length of the lace to the bottom edge so that the
lace did not just stick up.

The pincushion dolls always need something
around their waist to finish them off.

 I was lucky to have just enough of the lace to
gather up and affix around her waist. I then took
a long length of lovely ribbon and tied around
her waist tightly. Then I tied it into a lovely bow. 

It is evident that the dress needed something more!

It took me a while to find something that had a lining
attached to it.
I ended up using a child's slip that I think was vintage!
Hey, I remember wearing them!
Anyway the slip was 2 pieces, an overskirt with
an underskirt. This was perfect!!

So, I cut off a piece of the skirt. Cut off bigger
so it gathers. A good rule of thumb as to how much
or how wide to cut off of an existing skirt is, that
you need a good width for fabrics that are thin.
Cut off at least 12 inches wide and measure the
height of the pincushion and add about an 1.5 inch
for the top. Turn down a hem to the inside and in
my case here, you must try to keep the overskirt
bottom lace edge even with the underskirt hem as
good as you can. It is slippery!
Pin it or keep it even as you go with your fingers
and hand stitch down as you go keep adjusting
it as you stitch around.
Again I always use quilting thread and a quilting
needle. Always double the thread when gathering
for strength.
Be sure to leave a long piece of thread when you
finish sewing the hem down. Cut it off and then
knot it.

Put the skirt on over the pincushion and draw up
the threads tightly and knot it tightly about 3 times.
Then cut off the threads leaving a half inch tail
behind. Then take your fingers and lightly smash
in the gathers around the doll and under her if
possible. Always refer back to the previous directions
for the half-doll pincushions as each one tells
you new tips that I have learned along the way.

A view of the top of the slip.

Annie is all finished!!!

 A peek of her 2 slips or underskirts!

The back of Annie!!
Enjoy!!
Thank you for visiting me!