Showing posts with label Biscornu. Show all posts

Sunday, March 18, 2012

A show of 2 of my Biscornu patterns

Hello Everyone.
First, I would like
to give all of my new followers
a very warm welcome. I hope
that you enjoy my blog.
I have a beautiful Biscornu to
show you. Dede stitched up 2 of
my patterns and sent me pics to show
you. The patterns are so much prettier in Linen
than in Aida cloth.
The Biscornu's are stitched on 28ct Cashel
"Pampas" which she bought at the Picture
This Plus store in Kansas. 
Thank you so much Dede for showing everyone
your beautiful biscornu.
Your friend is a very lucky woman!

I really would love to see any pics that you have
stitched using my patterns. Some more Biscornu
patterns are on the way!
Many hugs and kisses sent to you all,
Hopblogger

Tuesday, September 6, 2011

The Giveaway has ended

Hello Everyone!
I would like to thank you all for the nice
comments that you left me.  You all were
very sweet.  Also I would like to thank those
sweet ladies that sent me emails concerned
about my eyes enough to tell me their own stories.

Sorry that it took so long!

According to my doctor it is going to take
6 to 9 months for my blurriness to go away.
I have found that if I use this font then I can
see the words. Its still blurry but I can make out what
the words say.

I put all of the names in a plastic container.
It is easier to shake up that way.
 Shake, shake, shake!!
 And I pulled out a name.
 Becca is the winner!!
My email address is cwethington@nc.rr.com

CONGRATULATIONS BECCA!
YOU ARE THE WINNER!

Becca - if you will email me and give me your address
then I will mail it to you.

If Becca does not answer in one week - then I will pull
another name out of the plastic container.

Take care of your eyes!
hugs and kisses from conny

Monday, May 23, 2011

Glittery Purple Blooming

This is the second Purple Blooming that I have made
since giving the first Biscornu to Tatyana of Mouse
House.  I am always experimenting on what next to
do with a Biscornu. This time Purple Blooming is
glowing! I hope you can see the glitter along the purple seams.
The photos do not show the full impact of the bicornu.
 As on the first Purple Blooming Biscornu - I used a
Swarvoski Pearl. Again I have used the same pearl.
However this time I have put the glitter on top of the
pearl to give it a sun-look. Glitter also decorates
the top of the yellow x's. I dont know if you can see
the glitter in this photo.
 But the yellow x's glow here! I have also
added another magnet to the inside.
 Again for the back I glittered the Swarvoski Pearl.
I used yellow glitter glue for the front and the back.
This Biscornu has turned
out so pretty with the glitter glue. There are about 8
color pens to choose from. I decided on yellow because there
was yellow in the biscornu. You just wouldnt believe
how pretty it looks.  This one was suppose to be mine - however
I gave this Biscornu to Linda. When she saw it she loved
the way it glittered! Enjoy the Biscornu Linda.
I will make me another one. There isnt any telling what
I do with that one.
by conny

Tuesday, April 19, 2011

Purple Bloomin'

Here is my new Biscornu to commerate Spring. Purple
tulips are blooming & softly the petals fall. I wanted
to put a yellow crystal in the middle to help represent the
sun - but I couldnt find one. I had to make do with
beautiful Swarvoski pearls!
Both the front & the back can be completed in one
day. This is the front.


 This is the back.


 And I did place a magnet inside just to hold a needle
or a small pair of scissors.
 Here are the 2 pieces after they were stitched.
Sorry that I was late. I hope you like this one. I will
post the patterns soon.
by Hopblogger

Tuesday, March 1, 2011

Happiness is..

a new Biscornu & this one is in lemon
yellow & blue. The front says
'Happiness is'. I gave this Biscornu a
a couple of new twists!

As you can see it is white on yellow
aida. But I did not use white
floss - instead I used 2 strands of white
candlewicking yarn. I was wanting
to try something new - so this Biscornu
became fair game. This yarn filled in the
aida cloth very well. It did not give me
anymore trouble to use than regular floss.

The back says 'me, u, us, we. It
is suppose to represent the entire
family - hubby, wife, & children, But
it is can also say my dear hubby, my dear wife,
my loving hubby, my loving wife. In other words
just for you & your dear hubby!

I used little yellow Swarvoski crystals.
You might not can see them but
the crystals do glow & shine.

Try not to mind my messy desk.
It sort of stays that way!

Here is the Biscornu's other
twist. Yes you guessed it - I
placed a magnet on the inside
just to hold a pair of small
embroidery scissors.

See - I am holding up the
biscornu. The scissors stay
onto the pincushion very well.

I hope you can see the words
better on this photo. White floss
on anything of color is hard to see -
but the results can be stunning.
This biscornu can be stitched & put together
in one day - that is if you have the time.
Instead of crystals try using jewelry, buttons,
or tassels to hang from each of those
quirky sides.
I will post the pattern in a few
days. Thanks for stopping by!
by Hopblogger

Thursday, January 27, 2011

I stitched it again.

This time in brown, blue & pink. It turned
out adorable. I used DMC 801, 809 & 899.
If you need any help putting one of these
together - just let me know. I dont mind
talking you thru it - no matter how long
it takes.

It is made a little differently
than the first biscornu.

Yep, look on all 4 sides. I
purposely left out part of the
pattern. It then made it much
more faster to stitch. However
it does look like something
is missing doesn't it. You could
sew on heart charms or some
basket charms in this area.
But if you do this - then sew it
all on before you stitch up all
the sides of the biscornu.
Both the front & back have the
same charms that say
'love forever'. See the back.

By now - are you
wondering what kind of charms
they are? Especially since I
had 2 of them that were the
same!

I took the backs off of 2
earrings. They weren't doing me any
good just sitting around unused.
Take a look in your jewelry box
and see if you have some
costume jewelry that you
dont mind parting with.
Also add jewelry to your
scissor cases & fobs. Add them
to your pincushions along with
other cute things that you stitch.
Thanks for visiting me!
by Hopblogger

Sunday, January 23, 2011

I tried putting this new

Biscornu on the blog last night - but my camera
absolutely refused to do it. Just in time for
Valentines Day. It is called
'Baskets of Hearts'. This biscornu is
SUPER QUICK & EASY! And it can be
completed start to finish in one day. That
is - if you can find the time to stitch it. The colors
look great together. Colors used
are DMC 320, 3801 & 798. My friend doesnt know
it yet but this is going to her house. I am
going to stitch it again
in chocolate brown & pink for myself.
Someday I hope to fill
my basket full of biscornu's. Give me time
to get the pattern fixed and then I will
put it here for you all!
Thank you for visiting me.
by Hopblogger


Friday, January 7, 2011

Floss Scraps

Remember Grandma.....
Hopefully you were fortunate enough to have
a grandma that was always crocheting something. If you
were - do you remember what those afghans looked like.
Did she make the afghans out of scraps of yarn or was she
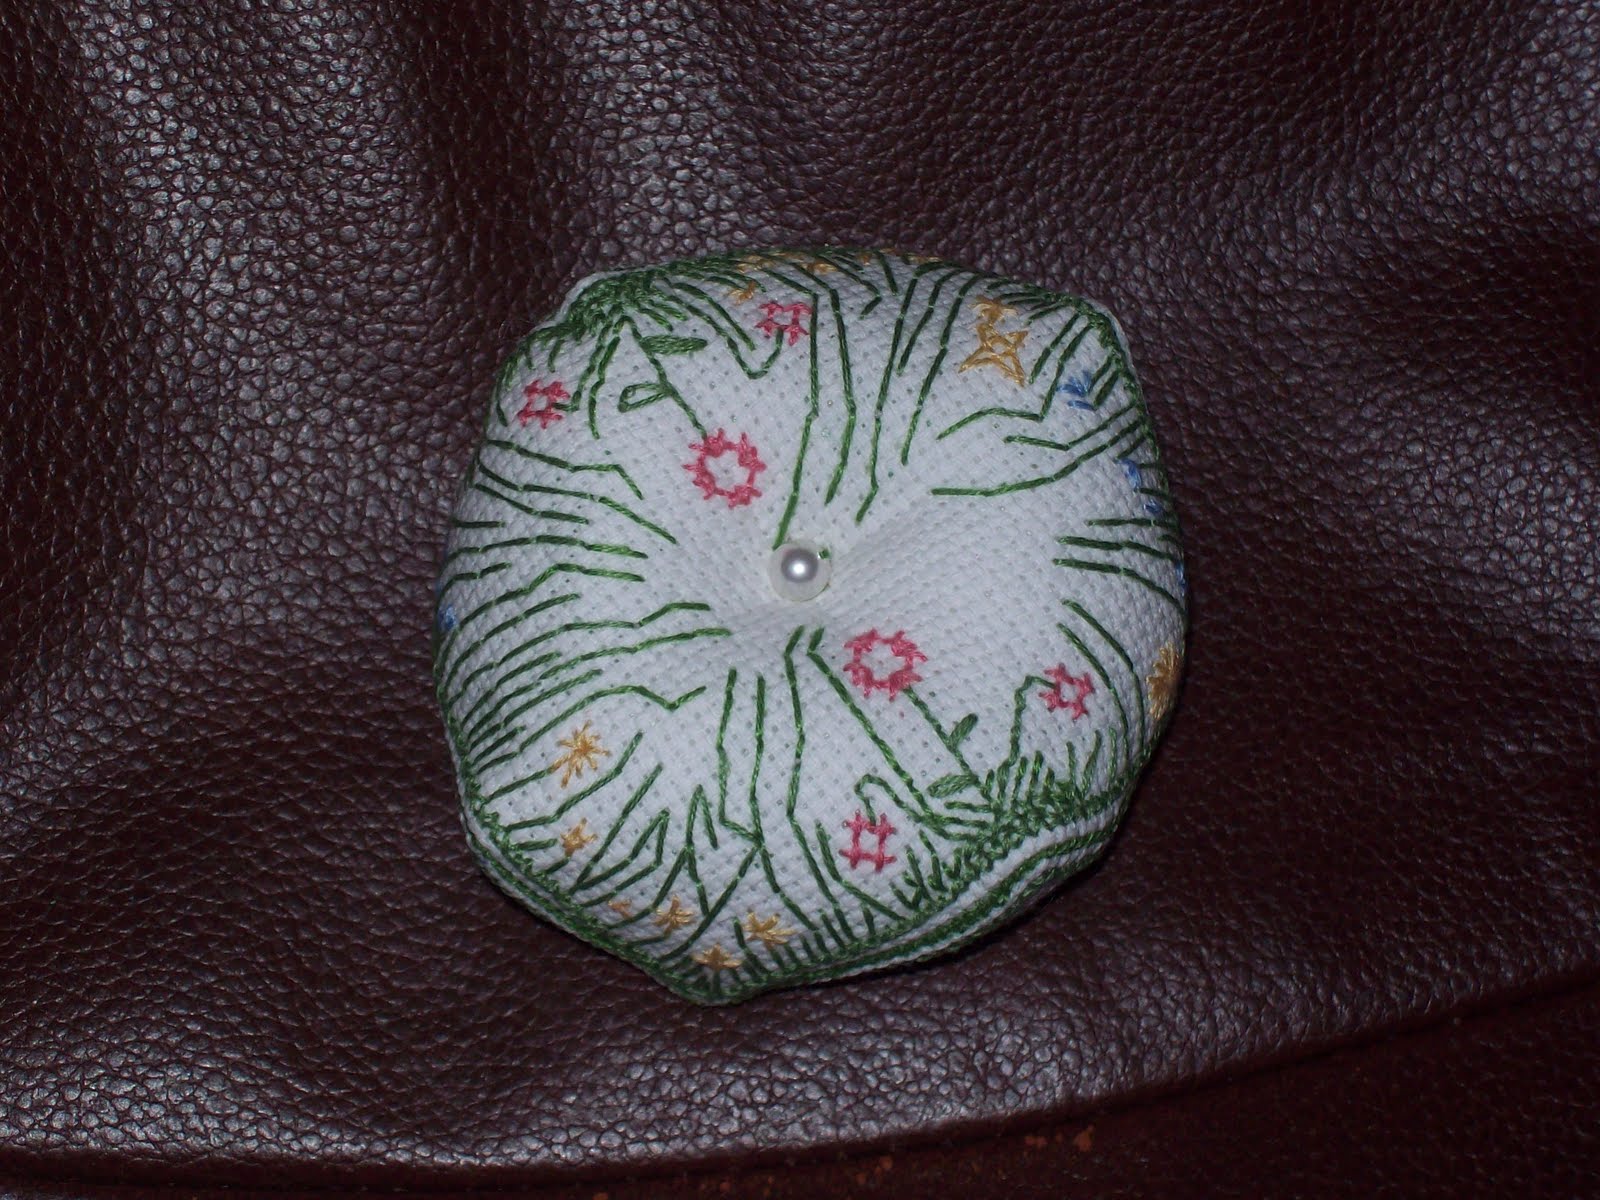
lucky enough to be able to buy her yarns needed. This biscornu
front & back is made to look scrappy. While the front has
order to it - the back does not. It is called
'Grandma's Afghans'. And it took me every bit
of 2 weeks to stitch. At every minute I was stitching
as hard as I could. The bottom picture shows
the complete set that I made which includes a needlebook
needleminder & a scissor fob. The front of this biscornu
even has fringe on all 4 sides. Although I could
have trimmed them - I didnt want to. I wanted to make
it look used and well loved by letting the fringe
appear uneven. And look - no button in the
middle - only 2 strands of floss was used. It is to give
the appearance of the thread knots showing through.
When you get ready to do the center just thread a large eyed
needle from the front & pull the floss thru to the back. Be sure
to leave a long tail on the front & knot it many times so it doesnt
pull through to the back. When that is done then pull the threads
in the back really tight & go back through to the front. Do this many
times & each time that you go to the front knot the floss from your
needle with the tail of the thread that you have. Once you are done
then end at the back of the biscornu. Knot it many times & leave a long tail
just like the front. Trim these tails down to whatever size you want.
If you dont want to trim them - its okay. Anything goes with this
biscornu!


And here is the back. It is so colorful. The
back is most suited for all of your floss threads
left over from prior projects. The more scrappier it is -
the better it looks. If you already have a collection
of floss scraps then use them here. If not then just
try to make it scrappy. But remember if you use your
floss scraps (and you should) then it will take you far longer
than I to stitch it. And it will take lots & lots of floss scraps!


Here is a side view of the top. When you are
ready to stitch the front & back together - be
sure to keep the fringe out of the way. You dont
want to sew it into the seams!


Englarge this next photo and see where
I put my name. Yes I stitched Conny on it! Now
there isnt any question of who this biscornu belongs to. Lol's


This is just another side view of the back.


I used a small linen hankie to make the needlebook. It
lends an old feeling to the biscornu. The inside of the
needlebook is just a piece of felt with a nice subdued
color to it.


Now you can see what I did. I used the holes on the
hankie to attach the felt to it. All I did was just do half of a
cross stitch all the way around - being sure not to forget
to include the ribbon so it will close. Make sure to trim the felt
afterwards. The little gold bird is a needleminder. Aint he cute!
And my scissors holds a long tail of fake coins to it.
It jingles! Oh - I just love it.


I thought you might like to see the inside of the
needlebook. Super Simple yea!

I am very excited about this set! Gotta get the
pattern ready so I can post it. Give
me a couple of days. And then stitch up this biscornu in rememberance
of your grandma!
by Hopblogger

Tuesday, January 4, 2011

How Does Your Garden Gro

Here are some additional pics. Sorry that the last posting
about this biscornu was so short. I have been
preoccupied with the next biscornu pattern - so I forgot
to tell you that the the scissor fob is just 2 velvetten flowers
sewn together back to back with a piece of ribbon in between.
It only took about 5 minutes to construct. The other is a
matching needle minder. Also I am so sorry that I dont
have a pattern for this biscornu.It left my house before
I could copy it. But if you enlarge the pics you will be able
to see the pattern in order to stitch it. Also I would like to
apologize if the pics are not in order - as I am having trouble
with my computer. This biscornu is much more striking
when you see it in person. I hope all of you are stitching up
my biscornu's! Enjoy
by Hopblogger