
Hello Everyone!
How have you all been?
I went to the
Thrift Store the other day and found
this beautiful large Wall-hanging. It
is machine quilted, (something that I
do not do). The quilting has a pretty
design and the lady that made it did
a very nice job with her fabric choices.
I could not pass this up and besides
it was only $5.00. A STEAL it was for
that price. I surely did
not know what I was going to do with it.
Especially since it is large.
After I washed
and dried it - the thought became very clear!
This Wall-hanging was destined to become
my new and only Sewing Machine Cover!!
I have procrastinated many times about making
a Sewing Machine cover and now that the
opportunity arose, it was fate - I tell you!
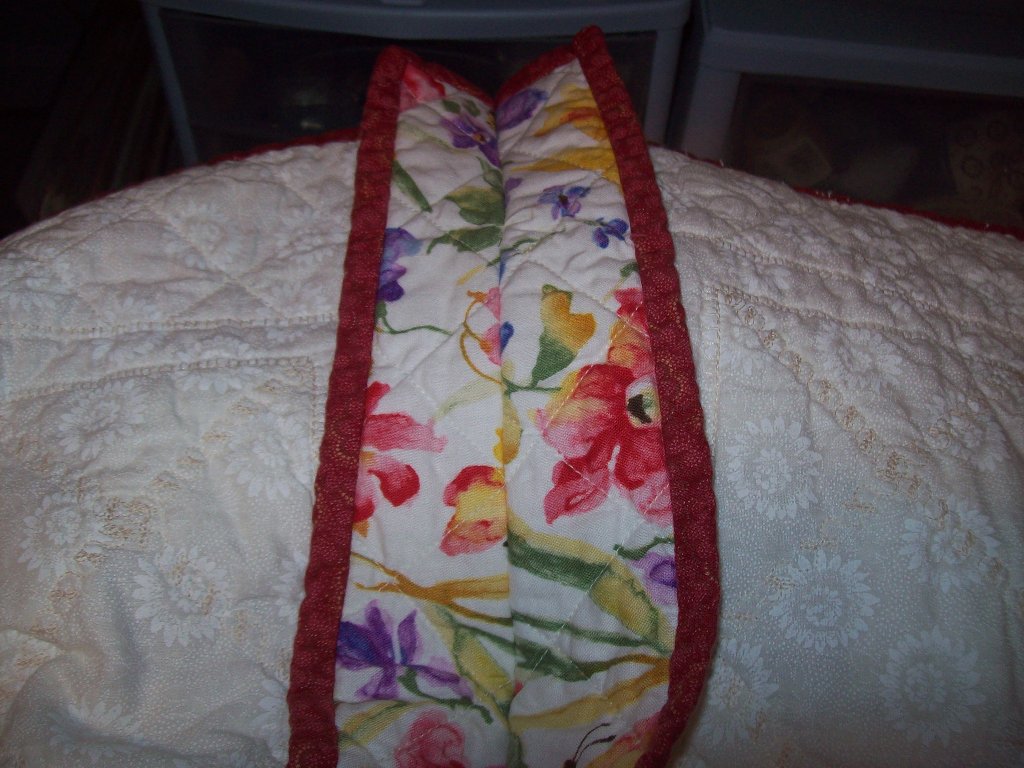
This is my finished Sewing Machine Cover.

This is the left side.

Here is the right side where the cords go in.

This is how I always kept the dust off before. I
do kind of like this linen fabric. Maybe that is
why I always kept it on my sewing machine.

Here is my sewing machine. Now it may look small
but I assure you that it is not. My sewing machine
is big! And it has a long handle across the top. This
Sewing Machine cover that I made was not meant
to be used in transporting my machine. I just wanted
a cover to keep the dust off. If I have to transport it,
then there is no way that I will transport it with
any cloth cover! My machine was expensive and it
came with a huge
plastic cover that will safely keep my sewing
machine from getting damaged.

See one of the sides of my machine. The right side angles.
It was not going to be easy to make a cover to fit
really good. So I opted on just making it fit the best
that I could. No rocket science here. In fact I kind of
like it that it is like this, because now I do not have
to make sure that the cover is perfect, just pretty and
decent looking.

I am so glad that the Wall-hanging was super large.
I measured my machine and this piece just fit top to bottom.
I did
not have to cut anything off of the bottom. Great, it
was already hemmed!!!
I hope that you can see the pretty machine stitching
that was done here.

This was the back side. Just stitch up the sides is
all that I did. Nothing fancy. It only took about 20
minutes and that included measuring my machine.
I love fast projects like this!!

See the pretty inside fabric.

The only thing cut off was the 2 side seams. It looks
like a lot but I assure you that it is only about 1.5.
inches cut off. Maybe I should have just left it on
there. Oh well - too late for that reasoning.
I think that I am going to look at those CUTTER QUILTS
on ebay. They would
be so pretty and vintage looking! Since cutter quilts
are damaged quilts - then you do not have to worry
about getting fuzzy with making the cover. When I get
a cutter quilt then I will show you another Sewing
Machine cover, with pincushions and other
stuff that I make!
This would be a FUN PROJECT!!! Make it fun.
Hopefully
you will find a wall-hanging or a cutter quilt in a
thrift store near you.
Keep your eyes open!! you never know when
inspiration hits you!
Hmmmm what else can I get into. I already have
a few other ideas!
Thank you for visiting!!
Many hugs and kisses,
Hopblogger
3 comments:
Dear Little Cupcake: This is ingenous, wow what a transformation.
Love this idea, I may have to start looking for a wall quilt to do the same.
I am wondering if the picture behind your sewing machine is the one you are looking for (the cross stitched on)?
Hugs
Catherine
Such a great idea and wonderful find!
Love your sewing machine cover! I probably need one myself :)
Hugs,
Tatyana
Hello Sweetie,
Yea - Barbara L. Waters made about 3 Sewing kits in the 1990's. I have been looking for all 3 of them but somehow they are either sold when I find them or they sell too high.
Tomorrow I will start looking again. If anyone would like to trade some cross stitch for them - this would make me happy!
Many hugs and kisses,
Conny
Post a Comment