Sunday, October 30, 2011

This is the last of my Halloween
patterns. There are 15 of them that I give to
you to do with as you please.. Stitch them
for yourself, for your friends, for charities. Just
please give me the credit for making the designs. I have
not had the chance to stitch any of these. I have
gone over them alot hoping that there are not
any mistakes with them. But human error is almost
always likely. I am keeping my fingers crossed! All of
these patterns are not too big and should be quick
to stitch.
This first pattern is titled
IT DON'T WORK!
As you can see nothing is coming out of the witch's wand.
She is telling this to the witch moon. The words can
be stitched  in single or triple strands of black. Stitch it
according if you want the words to pop out at you
or not. That choice I leave up to you. The colors are
up to you to change if you like.
 With this pattern, the pumpkins are not happy.
A bad witch turned 3 witches in pumpkins.
She glued them to each other and now the bottom
witch is trying to change the spell. They are doomed!
 This one is titled, "A Spell Gone Wrong".
 I really like this one. This witch go all caught
up in her spell. She was trying to relay a good
message but before she could do so - the spider
tried to envelope her! This pattern is titled,
"Tangled Web".
 These pumpkins stayed in the pumpkin patch
to long. They are angry about it. I like their
eyebrows. This one is titled "Angry Pumpkins".
 I had fun with the trees. I hope you notice the little
owls. sitting in the right tree. The left tree has a
spider web in it. The witch moon resides over all of
the trick-or-treaters. Those trees do scare some of them
away. The spooky house is begging all of the little
kiddies to come inside.
Anyway this pattern is titled, "Hallo-Street".
 This was my attempt at making a kitchen witch. She has
springy legs and spider web hair. Her broom is bent
and crooked. Her hat is too small for her head. Stitch
her face in green and see what she looks like. She does
not have a name. She's just a plain kitchen witch.
 This is a pumkin on a stick giving the spiders a
swing around the pole. He is titled,
"Maypole Pumpkin".
Do you wanna swing?
 I forgot to look at my blog to see if I had given
you this one or not. But in case I didn't give it to
you then - I give it to you now. This one is titled,
"Moon Web".
 This is an old witch. She has lost part of her hat
and it is no longer black. And her broom shrunk!
She is just titled, "Old Witch".
 Two pumpkins are sitting beside each other.
The bigger one knocked the younger one out with
his fist! And now he wants to know if they are still
friends. Maybe the spider on his head made him do
it. This pattern is titled,
"Are we stil friends".
 This witch is just pooped! Halloween has just tuckered
her out. She decided to take a rest on the moon.
And the witch moon does not like it. But she is not
getting up just yet. This pattern is titled,
"Witch Nap".
 This was one of the first patterns that I made. I even
started stitching this one. I got almost half way throught when
I had to stop. I hope you like
"Witch-Kins".
 These next 2 patterns I made to be a BISCORNU.
Either one can be the front. The spider is the same
stitch that I used for the flowers in the bees patterns.
The centers are now spiders. Each pattern has a spider in the
middle. This is to allow the ease of a button or
whatever you want to use for the center as this stitch
basically creates a hole in the center.
For the center you could use 2 little beads as
spider eyes. Thats just to give you an idea.
 Even though both spiders work out to be in the middle
of the biscornu - they are basically in different spots
of the pattern. Because one side is a full sie spider
web and the other is a corner spider web.
You could do this Biscornu differently than most.
It would be nice to see black linen or aida cloth with
a white spider web with a brown spider on one side.
On the other side white aida cloth or linen with the
ususal black spider web with black spiders.
I think this would be different and look nice.
 Well - I tried to do ugly. Notice the stars on her
dress and at the end of her hat. She has red
frizzy hair and red lipstick. She is titled,
"Fashion Diva".
This is the end of my Halloween pattern making for this year.
 I intend on trying to make patterns for each holiday
as long as my imagination still works. I hope you
like them and will use them. Until next year!
Happy Halloween
by Hopblogger


Sunday, October 23, 2011

A Halloween Set

Back in June and July I was really busy.
I have so much to show you! Halloween
is fast approaching. On my next posting I will
have many halloween patterns to share with you. 
Please dont look at the mess in the background as it
cannot be helped. I have a little room But everything
back there is being worked on.
This is my little halloween set. It doesnt set in a basket.
All of it sets in a little halloween cardboard box. It has
a scene painted on it all around the 4 sides. No I didnt
make it. Its just something to place halloween candy or
something like that in it. Here I am using it to place my
halloween stuff in it.
 2 witches and a black cat. So cute they are together.
When the sales start coming on and the sales should
be here. You can buy these little stuffed witches and other
little animals for a little of nothing. I love to use these
little stuffings as pincushions. Not that it gets me out of
work but they are just so cute. How could you resist them?
Its better to find a use for them than for them to just sit
around.  I bought both of these witches last year when
the sales came about. The little adorable cat came from the thrift
store. He was only 25cents.  I see that I have forgotten
to snap a pic of the Chatalaine. Between the witch and the
cat is the chatalaine. The black ribbon has spiderwebs
going all thru the ribbon. I purchased this at
Joanne's Fabrics. An little orance pincushion
has a witch's head attached to it. Its just a brooach
from the dollar store that I got a long time ago.
Next year I intend on
adding to my little set something cross stitchy.
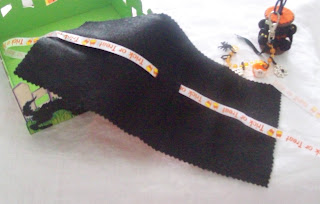
 I do like the wooden thread spools. They are just right
for holding a little pair of scissors upright. The top and the
bottom of the spool is just felt cut with pinking sheers
and lightly glued onto the wood. A ribbon of black bats
circle around the wooden spool. They have yellow-green
eyes. I like placing my sicssors in these spools because it makes
them easier to grab on to. I hope you like the fob.
This little fob when I found it at the thrift store was
missing all of its little charms except for the little
plastic orange trick or treat basket. There is a ghost
on the side - it is so cute. Since the little bracelet was
broken all I did was attach a little key ring with some
black ribbon to the bracelet and the ring. I tied it in
a knot and let the black ribbon hang as you see here.
The charms came from Joanne's Fabrics. There is a
black spider, a mummy, a little sign that says happy
haunting, the basket and a spiderweb with a spider.
This little bracelet only had the little black things on
there to hold the charms. It must have been broken
but when I saw it - it was for me. It was only 50cents.
How can you go wrong with that!
 My daughter helped me look for something to make
a needleminder out of. We couldnt find anything suitable.
So I couldnt make one of those but I will be keeping my
eyes open for something that will work.
This other item is a needlecase. Super-Simple! I did not
want anything that was not going to hold many needles.
In fact I am kind of getting tired of the cute little
needlebooks that will not hold the threads while you
are working on a project. This needlecase
can be made in a matter of a few minutes.
To make one of these - take 2 pieces of different
colored felt. There isnt any sewing involved. There isnt any
glue either. Cut the outer piece of felt any color and size you want.
Cut the inner piece of felt smaller than the outer piece.
This little pumpkin head is
a little brooach with a pin on the back. This basically
holds my 2 pieces together. This is going to hold
a lot of threaded needles! On the back all I did was
cut 2 small slits to run some ribbon thru. To close the
needlecase all you do is fold it into thirds and tie up
with the ribbon. Sorry I forgot to snap a pic of the
folded needlecase. However it is in the basket in the
very back in the first picutre.
 Here's the back of the needlecase. Be sure when
you cut the slits that you do not cut the inner felt
piece.
 Ever since I have posted about the potholders - I have
gotten alot of hits on it. This scissor case is a potholder.
In fact Its a biggg potholder. But I liked the design that
was on it. I knew that I wanted to show this pumpkin
so I sewed it together in a little different way that I seew
the others. I hope you like the tiny witches hat!
 Here is the back of the scissorcase. I sewed it together
down the middle. But before I did that I sewed the bottom
closed. Super-Simple.
 Another little pic of the witches hat. It is small
for my large gingher scissors. The point is made from
a 2 inch piece of felt. It is lightly stuffed. The black
brim is felt and is just a little bigger than the cone.
 This is another potholder soon to be made into
another scissor case. I like the ghost and the purple
color. It is so vibrant.
 Now - this is a new item that I am not sure that you
will like. My intentions were to have this as a floss holder.
It will hold many of them. In fact it could hold 36. You
wouldnt believe what I made it from. You know those
dishwasher baskets that come with every dishwasher.
Yep - thats what it is. The baskets come in a few other
colors than white. I picked up 3 of these this past summer.
All I did was cut the basket apart and take small ribbon.
This ribbon is the same ribbon that is on the needlecase.
I just wrapped it around the outer rim. A little glue to
start and a little glue to end.
 Next year I hope to wrap the floss on it for a project.
I have another one of these that I cut a few strips of pink
flannel not even an inch wide and just wrapped it around
the outer sides just like above. It turned out really pretty.
I hope you like.
Hally Halloween!
by Hopblogger

Sunday, October 16, 2011

Are you getting ready for Halloween.
I hope all of these patterns have been
putting you in the mood.
This is a pattern by Kirsten Schmidt of
Kissycross. If you want this pattern
then you must email her for it.
Dont worry she will email it to you.
Here is her blog address.
Go check out her freebies. They are great!


In case this address does not work - just type it in
or google her name. She can be found.

I stitched this witch back in July.
Originally her pattern called for a brown dress.
I love the brown dress and have full intentions of
stitching this again in brown. But I just couldnt
resist making her dress in pink. Plus now you can
see her boobie outline and know she has them.
This pattern can be started and finished in one day!
Have fun
Many hugs to you all,
conny

Saturday, October 8, 2011

Halloween is upon us

Happy Halloween!
Its coming closer.
Eyes are still blurry. Most of you are probably
wondering how does all of this get posted if my eyes
are blurry. Thank goodness for my daughter.
She has been helping me tremendously! She takes me
everywhere I need to go and then some.
Thanks so much!
This week I have more patterns for you.
Here are some more Halloween Freebies. I hope you like
them. They are all quick and easy. You can finish them
in no time at all.
Feel free to change the colors
This first one is titled 'Ghostly Pumpkins'.
This one is called 'Give me all your candy'. It is a
small trick or treater. His hands are in his pumpkin
suit - so just pop the candy in his mouth.
 This one is 'Hats off'.  Notice that the wiches do not want
to take them off.
 'Just Plain Wicked' is stitched in DMC 606 Bright
Orange. Stitch this if you feel wicked!
 'Stick Witch Ellen' is more of a young modern witch.
But dont thing she is so sweet. She will put a hex on you.
Many stitching hugs
by hopblogger

Monday, October 3, 2011

Halloween Freebies

Since I cannot cross stitch I thought that I
would share a couple more of my untested patterns with you.
If you do stitch it - please share with me a photo
I havent had the chance to see what it
looks like  yet!
The first pattern is titled
'No Tricks just Treats Please'.
I hope you like her!
This next pattern is titled 'Witch Hazel'
Feel free to change the colors to suit your taste.
Many stitching hugs
by Hopblogger

Saturday, October 1, 2011

Hey You'all

No photo on this one. I wanted to
give you the blog address for
Velda's freebies.
All of her freebies are here at
this address. Go by there and say
hello!

by Hopblogger